We have had lots of struggles and challenges in our lives, but we've had even more blessings!

Friday, April 29, 2011

Not just for Easter 03

    'Not just for Easter 01',was about the pink bunnie sandwich cookies I had made as Easter treats this year. 'Not just for Easter 02', was about the yellow duckie sandwich cookies. And yes, the two are made from two totally different recipes.
    I had said that I fully realized that Easter, Valentines and Christmas are when most people usually bake sugar cookies. How-ever, these cookies can be made for ever so many other occasions / events!  Change your cookie cutter, and sometimes even your food coloring, and wa-la! You'll have a whole new type of cookie ;-) I had shared a couple of ideas for other occasions in the '01' posting.
    Today, in 'Not just for Easter 03', I am showing you the Rice Krispie(TM) eggs I make. And this year, I took them up an additional notch. ;-)
    I have been making Rice Krispie (TM) treats into eggs at Easter time and wreaths at Christmas time, for y-e-a-r-s!!!  HONEST!  I use to make them back when our sons were all in elementary school.  So I found in highly amusing to see commercials on TV this year about making Rice Krispie (TM) eggs, as well as seeing umteen links to other Easter treats people had made out of them this year.
     For the record, well actually, four records - First, I did get my ideas from a news paper / magazine ad / promo all those years ago. Secondly, the style eggs I make, are not the type they were doing the commercials about this year. Thirdly, I know that in the past, I already did a posting about Rice Krispie (TM) treats. (You can find that one HERE) So why then am I doing another one about them? Because I had told a couple of 'my girls' I would.   ;-). And fourthly, no, I do not plan on making this blog only a cooking blog. You know I could not give up sharing stories about my kids or their pets with you. Or about 'treasures' I find. Or... life. ;-)

    I didn't remember to start taking pictures until w-a-y in to the process. Sorry. I am seriously thinking about making myself a sign to hang in the kitchen, reminding myself to take pictures. o;-p

    The first step is to HEAVILY spray a stainless steel pan (or whatever type you have) with pan coating spray. Put it on the stove burner, turn the burner on, and heat until all of the spray melts. Doing so will then get the spray absorbed into the pan and make clean up ever so much easier! (<-- Bonus tip there ;-) )
   
    As soon as all of the spray looks melted, add your butter to the pan and turn the heat down a bit. Once the butter is melted enough that the bottom of the pan has a light coating of butter, add your marshmallows. Wait a minute or two, then stir. The stirring will help lightly coat the marshmallows with the hot butter and help them to melt faster. Wait another minute or two, then start stirring in earnest.
    For what it is or isn't worth - I recommend using either a heavily sprayed wooden spoon, or a thick plastic spoon for this. For a reason unbeknownest to me, metal spoons, even when sprayed well, just don't seem to work out as well.
    When your stirring, make SURE that you keep the spoon attached to the bottom of the pan. Around the outside, around the middle, cover all areas of the bottom of your pan! Only rarely do you pick the spoon up and use it to scrape the actual sides of the pan.
    When all of the marshmallows are completely melted, and you have thourally blended them with the melted butter; with the burner still on very low, start adding your Rice Krispies (TM). Once all of the cereal has been added, and your ready to really go at the mixing everything together, turn your burner off.

    After everything is well mixed, set the pan aside for about four to five minutes. During this time, get out a piece of parchment or waxed paper, and lay it either on your counter, or on a cookie sheet pan.

    After the four to five minutes are up, spray your hands with the pan coating spray, then rub your hands together as though your rubbing in lotion.
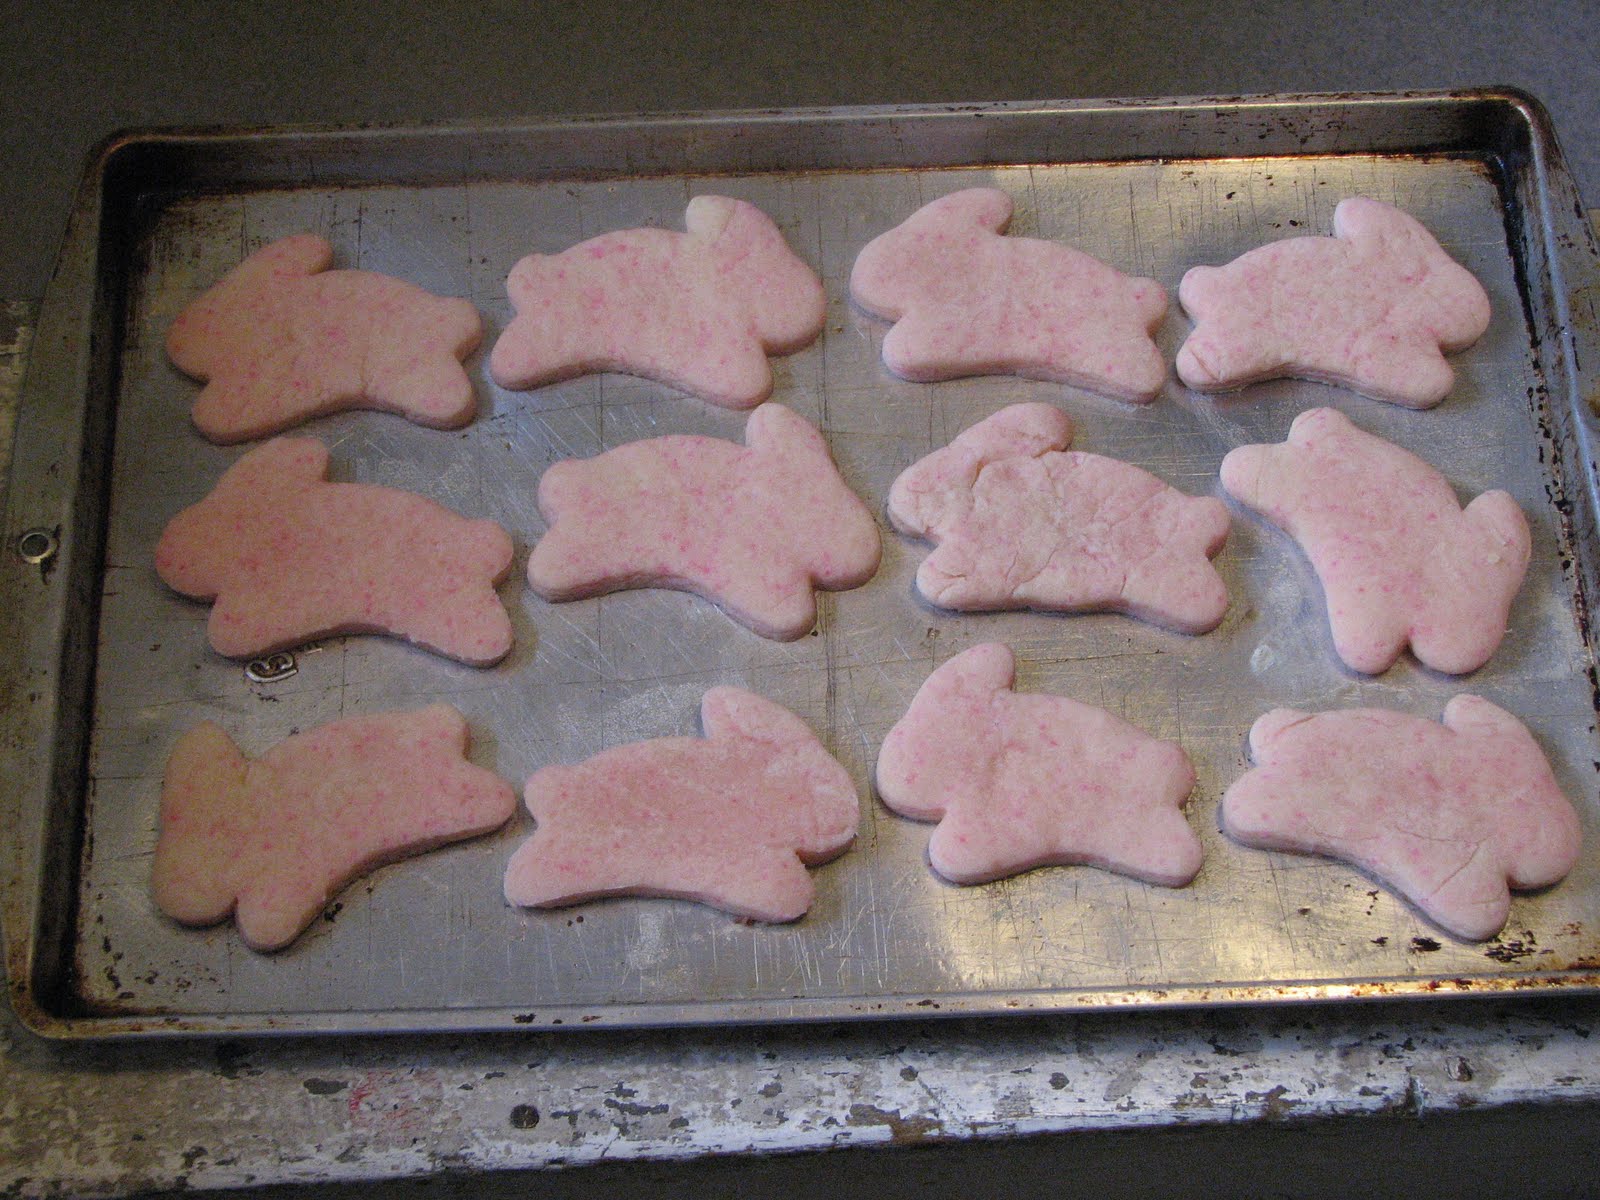
    Scoop out a handful of the rice krispie (TM) mixture and squeeze it together, while forming it into your desired shape. YES, the mixture very well could still be really warm. Work fast ;->.  I have found that I need to again spray my hands, after every fourth or fifth egg/wreath. (You don't need to wash them first, just add another coating of spray.)
    As each creation is formed, set it onto the parchment or waxed paper to allow to set up. Occasionally you will find that you didn't get one adhered quite enough together, it will start cracking apart. Don't fret! Just use your fingers to squeeze it together again!
  [ Let the eggs 'set up' for a good twenty minutes before decorating them, or doing anything else with them. ]
   Like I said earlier, this year, I took them (the eggs) up an additional notch. ;-)  I had been trying to figure out which type of a chocolate treat I wanted to make. Come on, ya gotta have something chocolate in Eater baskets or bags (more on the latter one coming later ;->)!!! Then the Lord brought to my mind how I sometimes melt chocolate chips on top of a pan of Rice Krispie (TM) treats. Hummm....

    Get out a double boiler. Put water in the bottom pan, but not enough for the water to actually touch the bottom of the upper pan when it's set in place. Place the pan of water on the stove. Place the second pan on top and dump in l-o-t-s of chocolate chips. 
    [Back in the posting about the Chocolate Covered Strawberries, I mentioned about trying different ways of melting my chocolate, as well as trying different types of chocolate; but our favorite is via using Nestle (TM) semi-sweet choc. chips. Remember, lots of store brand choc. chips contain wax, and thus we have found them to not melt as smoothly or be quite as tasty.]
      Wait a couple of minutes until you can see by looking that some of the chips are turning darker due to getting warm. Start stirring them, making sure to scrape the bottom of your pan as you do so. No, you do not have to stand there and stir them the whole time.
    Once the water in the bottom pan comes to a high boil, turn it w-a-y down. By now, all of the chips will be melting and you'll be able to stir them into a nice smooth sauce like substance. Keep your burner just barely on while you dunk your treats.

    I hold onto the stem of strawberries to dunk them, what was I going to use to dunk the Rice Krispie (TM) treats?  Just using my fingers would be like looking for burns. I thought of using tongs, but then dismissed them. Then the idea of using a meat fork came to mind. :->  Bingo!
    Occasionally an egg would slide off the fork, but it was really quite easy to put the tongs back in the same holes and pick the egg back up. That also sometimes meant that I then had to use the spoon to smooth the chocolate over. But it was easy to do!
    After you dunk one, place it back on the paper. You CAN place them quite close together. Just preferable not touching.
    Don't these just look ever so yummy?!?!!!!
    If you run out of dip-able chocolate, just add more chips to your pan, turn the burner back up for a bit, and soon you'll have enough again.

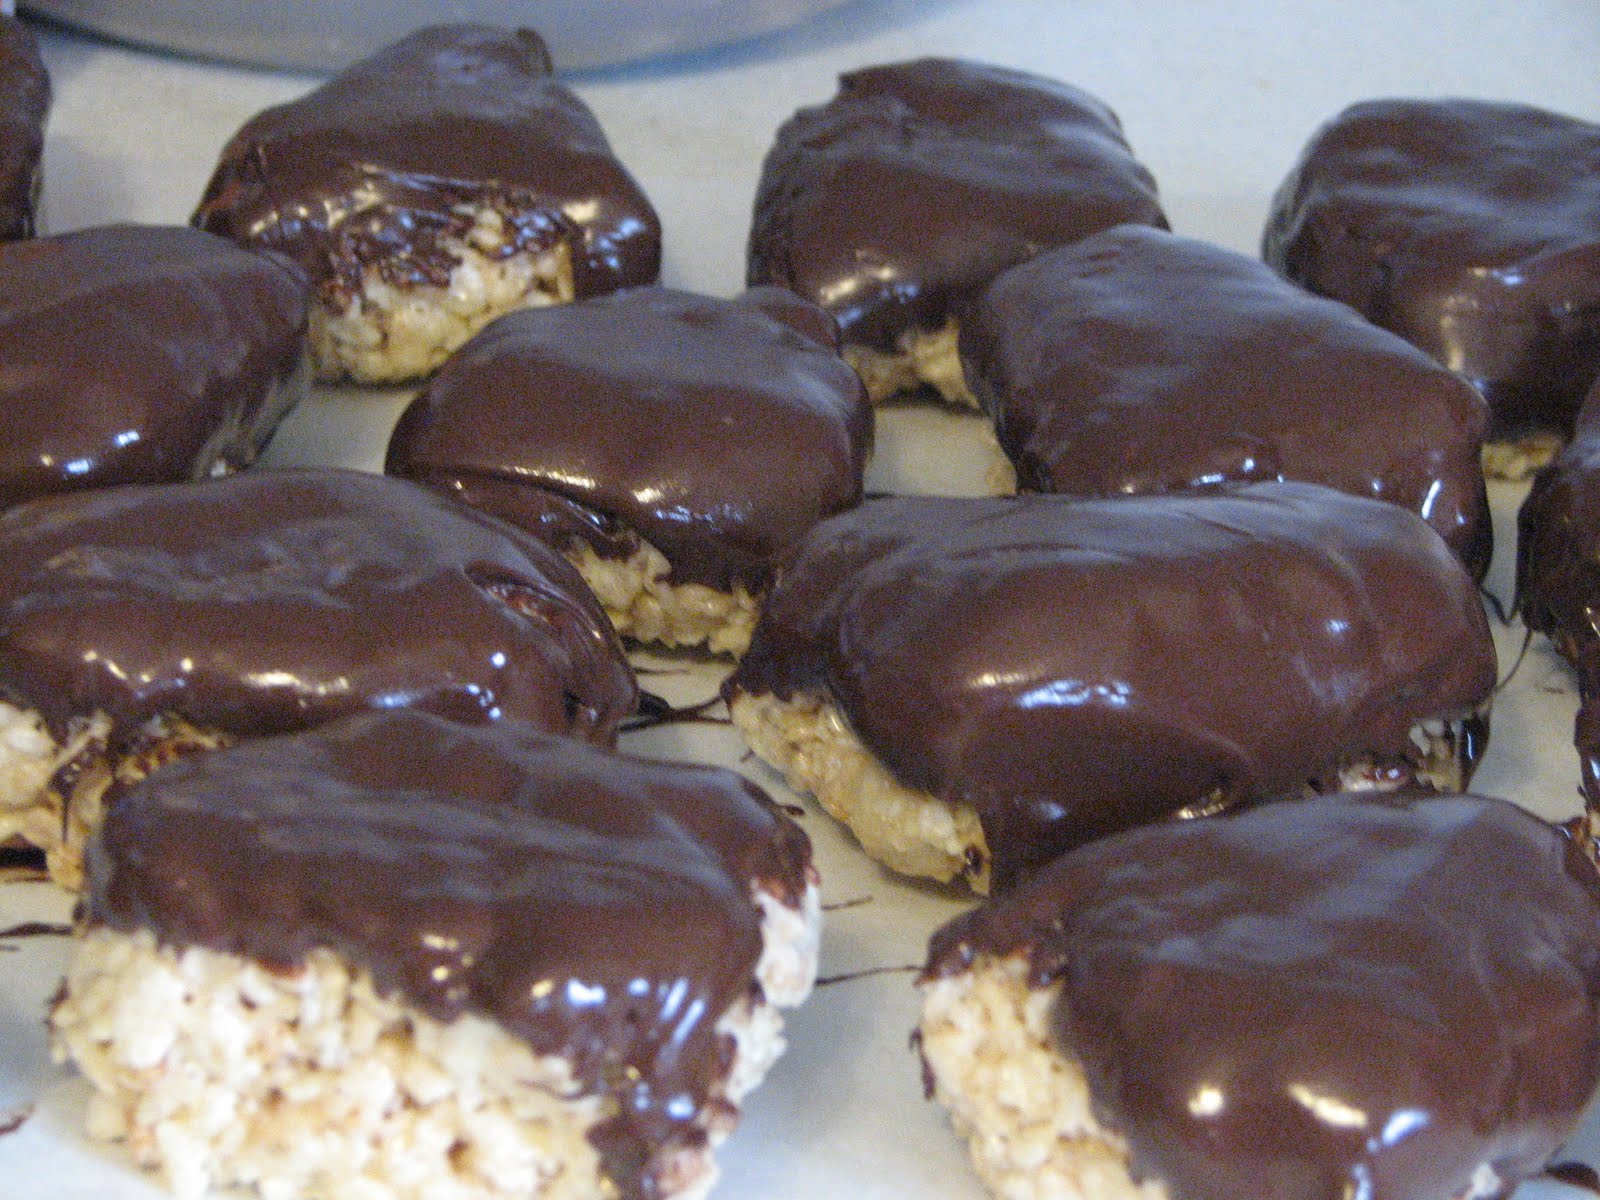
    I use to decorate my Rice Krispie (TM) eggs with little pink flowers made via tube frosting accompanied by leafs made from green paste tube frosting. I had planned to again this year, so I had put tube frosting's on the shopping list for Brian. The thing is, I didn't specify which type of tube frosting I wanted. He bought the gel type.
      Aw well. He DID try :-)

     Besides, they didn't look half bad with out the flowers on top. And man did they taste wonderful!!!

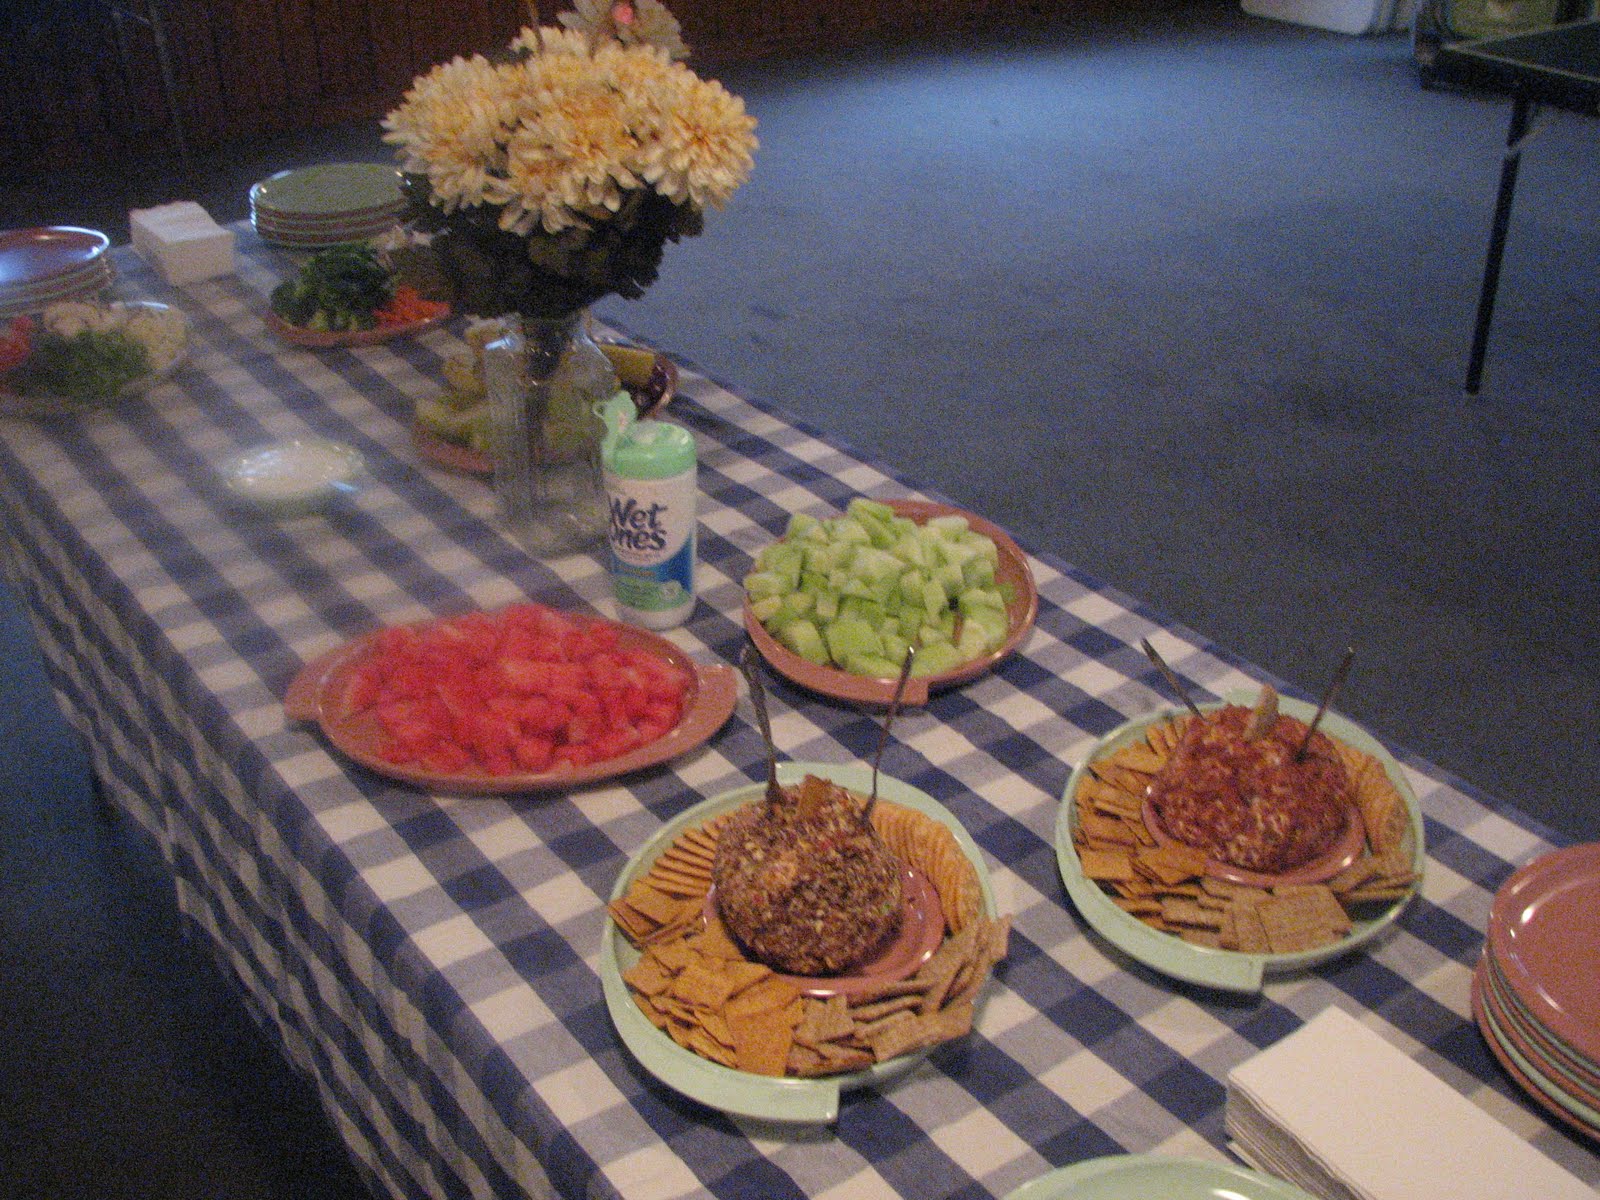
     This is what we took with us to Brian's side of the family Easter dinner.

    Now for the recipe -
    'Shape-able Rice Krispie (TM) Treats'
       recipe adapted by Cheryl B.

        Pan Coating Spray
       1 stick (1/2 cup) Butter
       1 bag (10.5 ounces) mini marshmallows
                (they melt down better than the large ones do)
       8 cups Rice Krispie (TM) cereal

      optional - Nestle (TM) semi-sweet chocolate chips

      Spray and then pre-heat your pan before adding the butter. Once there is some butter covering the bottom of your pan, add the marshmallows. Wait a couple of minutes and then stir, coating the marshmallows with the butter. Wait another couple of minutes and then stir the mixture till smooth, making sure to continually scrape the bottom of the pan.  turn the heat way down, and start mixing in the cereal. Once all of it is added, turn your burner off and completely mix everything.
    Set pan aside and wait four to five minutes, mean while setting out your parchment or waxed paper.
    Spray your hand heavily with pan coating spray, and then rub in as you would lotion. Scoop out a handful of the cereal mixture, and work quickly to form it, squeezing it together as you go.  Set your creation on the paper to set and dip out another handful.  When you have made all of them, let them set up for a good twenty minutes before decorating or dunking them.
   
    To dunk them in chocolate, melt the chocolate chips in the top of a double boiler. Use a meat fork to dunk your shapes, then place them back on the paper to set up again.

    Recipe makes twenty (20) 2" wide (at the back) 3" long eggs.

    Are you drooling yet? Benson sure took tempting looking pictures for me, didn't he? (Thanks Benson!)

~ ~ ~ ~ ~ ~ ~ ~ ~ ~ ~ ~ ~ ~ 
  I 'plan' on linking this particular posting up to:

~ "Sweet Tooth Friday('s)", hosted by Alli, at 'Alli 'n Son' (Parenting and Life with a side of Chocolate) (http://alli-n-son.com/) 
~ "Foodie Friday('s)" (#1), are hosted by "Gollum" (aka: Michael), at 'Designs by Gollum' (http://designsbygollum.blogspot.com/)
~ "Foodie Friday('s)" (#2), are hosted by Bianca, at 'Little Brick Ranch' (http://www.littlebrickranch.com/)
~ "Friday Potluck('s)", are hosted by Erin, at 'EKat's Kitchen' (http://www.ekatskitchen.com/)
~ "Fat Camp Friday('s)" are hosted by Miranda, at 'Mangoes and Chutney' (http://www.mangoesandchutney.com)

LATE ADD -
~ "Sweets For A Saturday", hosted by Lisa, at 'Sweet As Sugar Cookies' (http://sweet-as-sugar-cookies.blogspot.com)

Wednesday, April 27, 2011

Not Just for Easter 02

    Like I had said on Monday (Not Just for Easter 01), I am going to start posting some of the treats I made for Easter, even though most people usually only bake sugar cookies for Easter, Valentines and Christmas; with the hopes that you will get creative (change your cookie cutter, and sometimes even your food coloring) and use them for some other occasion / event (in that first posting, I listed some ideas). Please be sure and let me know what you do! :-> 

    Today I am posting the recipe for the Yellow Duckies. [Yes, the bunnies and the duckies are made from two totally different recipes.]
      I started making the dough (I was making this kind by myself) and didn't remember to start taking pictures until w-a-y in to the process. Sorry. But hey, at least it did come to mind part way through ;->.

     The recipe says to mix ingredients together in order given. The first first two ingredients are "oleo" and sugar. For those of you who aren't familiar with the term "oleo", it is a very old label for butter.  After measuring the sugar into a bowl, I place the  butter on top of it and microwave it till the butter is melted. After thourally blending the two together, I add the eggs. (Go HERE for some bonus tips about using eggs). Next comes the vanilla and then the flour and baking powder.
    I then add some yellow sprinkles. (I was making six times the recipe, but only added one small jar of the sprinkles.) Right then is when I thought of the camera.

    Once everything was combined thourally,( I found that when your doing multiple recipe batches like I was, the best (aka: easiest ;->) way to blend it all together is by hand.)
   Cover dough and chill (refrigerate) for two (2) to three (3) hours.  (I had added some Bonus Info. about this part in the '01' posting).

    The recipe then says to "roll out and cut with cookie cutters".  So, after removing your dough from the fridge, scoop out a blob of it and dump it onto a flour covered rolling surface.
    (yes, this picture is actually of the pink bunnies dough ....)
    Using a flour coated rolling pin (use your hand to rub flour onto your rolling pin), roll the dough out to about an eighth  inch (1/8 inch) thickness. (and so is this picture)
    Cut your cookies out as close together as you possibly can on your dough. The more times you scoop left over dough up and re-roll it, the more likely it is to bake up as non-moist cookies. (Bonus tip --> ) A good rule of thumb on this is, the first time, roll the dough out and cut out your shapes as close to one another as possible. Scoop unused dough up, lightly knead it together, roll it back out and cut shapes out again. This time (the third time), add more fresh dough to the leftover dough before you knead and re-roll it.
     (back to the right colored dough ;-p)

                    (dough before baking)
   IF you plan on making your cookies into sandwich cookies, then fill half of every (sprayed) cookie sheet with cookies cut out from one side of the cookie cutter, turn the cutter over, and cut out enough to fill the other half of your pan. That way you can put the flat side on the inside of the cookie and have the nice sides facing out. (<-- Bonus tip there)
        (baked cookies)


        A couple of days later, I made the frosting.  It was Easter morning (I had gotten behind on things while doing the "Baby Shower / Come Visit Time" ).  So I mixed the frosting all up and then had our "kids" frost them. Nope, no pictures :-[  I had dinner all prepped / cooking, made the frosting, and then went into the living room and crashed (my reign as "Ms. Vertigo continues). And NO, I am not showing you the picture of what I looked like by that point (even though someone did snap one of me). It's not a picture I even want saved!

    This particular cookie recipe is not accompanied by it's own frosting recipe, so I used my 'Cream Cheese/Butter' one.

    First, place both the cream cheese and the butter in a bowl together.
    Microwave them until the butter is pretty much melted (the cream cheese will be extremely soft).

   Mix these together (either by hand or by mixer). Add some vanilla and then powdered sugar. When it gets really thick, add some milk and your desired colored food coloring, if you so choose.  (Bonus Tip here --> for a really delicious frosting, use canned condensed milk for most of your milk.)
     Once it's a good thick smooth mixture, it's time to frost the cookies.
     IF your making them into sandwich cookies, frost the back side (the side that was sitting on the pan), let it sit for a couple of minutes, and then top it with another cookie, putting both 'back sides' against the frosting.  OR, you can just frost them as normal single cookies. Your choice.

    Now for the recipes:

  "Christmas Cookies"
      This recipe had been given to me by my friend Laurie W.
   3/4 cup "Oleo"  (aka: butter)
   1 cup Sugar
   2 Eggs
   1 teaspoon Vanilla
   2 1/2 cups Flour
   1 teaspoon Baking Powder
   (colored sprinkles if desired <-- my addition))

   Mix together in order given. Chill dough two (2) to three (3) hours. Roll out and cut with cookie cutter.
   Bake at 350 degrees for 10 minutes or until they just start to brown around the edges.

  "Cream Cheese/Butter Frosting"
       recipe made up by Cheryl B.

    6 to 8 ounces of Cream Cheese 
    6 to 8 oz. Butter
    1 teaspoon vanilla
    4 to 6 cups Powdered Sugar
    Milk (or Condensed Evaporated Milk) as needed
   Food Coloring to desired color
  
   Melt your butter and cream together in a bowl in the microwave. Blend thourally and add your vanilla. When blended, start blending in your powdered sugar. When it gets really thick, add some milk (small amounts at at time). Add more powdered sugar. More milk product. Blend in food coloring, if desired.
  Apply to cookies, or cakes, or bars, or graham crackers, making sure to do a 'quality control taste' first. ;->


~ ~ ~ ~ ~ ~ ~ ~ ~ ~ ~ ~ ~ ~ 
  I 'plan' on linking this particular posting up to:

~ "Foodie Wednesday('s)", hosted by Bibi, at 'Daily Organized Chaos' (there is nothing wrong with living with chaos as long as it's organized)  (http://www.dailyorganizedchaos.com) 
~ "Whatever Goes Wednesday('s), hosted by Michelle, at 'Someday Crafts' (http://somedaycrafts.blogspot.com/)
~ "What's Cooking Wednesday('s)", are hosted both by 'The King's Court IV' (http://thekingscourt4.blogspot.com/search/label/What%27s%20Cooking%20Wednesday) and 'Turning The Clock Back' (http://turning-the-clock-back.blogspot.com/search/label/what%27s%20cooking%20wednesday)
~ "Whatcha Makin' Wednesday('s)", are hosted by "bookaddict4real", at 'Scrapaddict4sure' (http://www.scrapaddict4sure.com/)
~ "Recipe Swap Thursday('s)", hosted by Alison, at 'Prairie Story' (http://prairiestory.blogspot.com/) 
~ "Full Plate Thursday('s)", hosted by Miz Helen, at 'Miz Helen's Country Cottage' (http://mizhelenscountrycottage.blogspot.com/)

Monday, April 25, 2011

Not Just for Easter 01

     I am going to start posting some of the treats I made for Easter. Yes, I fully realize that this now past Sunday was Easter Sunday. How-ever, even though most people usually only bake sugar cookies for Easter, Valentines (which we've also already had this year) and Christmas (which they'll probably start showing commercials for again here soon 8-/), these cookies can be made for ever so many other occasions / events!  Change your cookie cutter, and sometimes even your food coloring, and wa-la! You'll have a whole new type of cookie ;-)

    Today I am posting the Pink Bunny Cookies I made for Easter. [Yes, the bunnies and the duckies are made from two totally different recipes.]
 
    One year Kate and I made these late spring / early summer. We had used a foot shape cookie cutter, and after cutting the dough out and putting them on the pan, but before baking them, we had used small paint brushes and painted the toe nails with red food coloring. The guys found them kinda strange. ALL of the girls found them delightful!!  (No idea if I have pictures of them someplace or not.)
    I've seen them cut with 'onesie' cookie cutters for a baby shower.
   At one wedding Brian catered, they had heart shaped ones with the bride and grooms names written on them in icing, attached to both a recipe for the cookies and a heart shaped cookie cutter, via a ribbon strung through a small hole near the point of the cookies. These were in baggies given to the guests as favors.
    So-o-o, I am going to go ahead and post the goodies I made for Easter this year, with the hopes that you will get creative and use them for some other occasion / event. Please be sure and let me know what you do! :->

     We (our neighbor Amanda (Chris and Amy's 13 year old daughter) ) and I started making the dough and I didn't remember to start taking pictures until part way in to the process. Sorry. But hey, at least it did come to mind part way through ;->.

    According to the recipe, the first step is to combine the sugar, margarine, shortening, vanilla and eggs. Then beat till creamy. I, of course, do it a bit differently. After measuring the sugar into the bowl, I place butter (not margarine) on top of it and microwave it till the butter is melted. After thourally blending the two together, I add the shortening (I used Crisco (TM) ) and vanilla, blend all of it together good, then mix in the eggs.  You are welcome to do it which ever way you prefer.

   The recipe then says to add flour, baking powder and salt; mixing well. Add candy sprinkles. Right after that is when I thought of the camera.
    You then need to again mix everything thourally. I found that when your doing multiple recipe batches like I was, the best (aka: easiest ;->) way to blend it all together is by hand. Blend it till it's smooth looking, like this:

  Cover dough and refrigerate for one (1) hour.
  Bonus Info. here --> Recently, while Brian and I were watching an episode of the TV show 'Iron Chef America', I learned the scientific reasoning's behind why you need to chill certain types of dough, before you roll and cut them. Or perhaps I should phrase that, I learned what happens to the dough while it is being refrigerated that makes it roll-able and cut-able.
    The episode was, "Symon vs. Mendelsohn". The original air date was back on 3/7/2010, but had been aired again on Sat., April 2nd, 2011.

    One of the contestants was vacuum sealing pasta dough. The announcer (Alton Brown) said, "Now here's the interesting thing about that. When you are making a pasta dough, you typically need to refrigerate it for at least an hour or so so that the flour granules can hydrate. Soak up the moisture and become pliable. Uh. Before you can actually roll it out. By sealing it up in vacuum bag. Uh. You can compress it and that will actually speed the hydration process."
     So then, while your cookie dough is in the refrigerator, the flour granules are hydrating.

    After removing your dough from the fridge, scoop out a blob of it and dump it onto a floured covered rolling surface.

     Using a flour coated rolling pin (use your hand to rub flour onto your rolling pin), roll the dough out to about an eighth  inch (1/8 inch) thickness.

    Cut your cookies out as close together as you possibly can on your dough. The more times you scoop left over dough up and re-roll it, the more likely it is to bake up as non-moist cookies. (Bonus tip --> ) A good rule of thumb on this is, the first time, roll the dough out and cut out your shapes as close to one another as possible. Scoop unused dough up, lightly knead it together, roll it back out and cut shapes out again. This time (the third time), add more fresh dough to the leftover dough before you knead and re-roll it.


                 (dough before baking)
   IF you plan on making your cookies into sandwich cookies, then fill half of every (sprayed) cookie sheet with cookies cut out from one side of the cookie cutter, turn the cutter over, and cut out enough to fill the other half of your pan. That way you can put the flat side on the inside of the cookie and have the nice sides facing out. (<-- Bonus tip there)
                         (baked cookies)
    I was not up to frosting the cookies right then, nor was I able to get through the basement to where my deep Tupperware (TM) containers are stored (I'm trying hard to follow at least some of my specialists instructions o;->). So I got out a huge sized bread bag and stored them in it.

    While this method did work at keeping the cookies fresh, there was more breakage then I was happy with, due to how the bag got moved, bumped, the innards shifted, etc..   Just thought you should know.
 
    A couple of days later I made the frosting. I didn't re-read the recipe and started my usual way by melting together cream cheese and butter. This recipe didn't call for butter. Oh well.
    They didn't want to blend together smoothly this time, so I got out the mixer, still without consulting the recipe.

    I had already thawed the frozen strawberries, and had some straining.

    Dumped in the strained strawberries and mixed well. (I saved the liquid to help make the pink lemonade for the shower/get-together).

    The color was barely pink. :-[  I didn't want to wait long enough to drain more strawberries, so I added food coloring. Yes, quite a bit. I wanted the frosting to be REALLY pink between those layers of cookies!
    Much better! :->

    However, it was rather gooey. I knew how to remedy that problem. (I'll show you in a minute).

    Frost one side of a pan of cookies.
    Take the next pan full and use them to top the frosted pan full.
    Do NOT press down very hard when attaching the top cookie, or your filling will come spurting out the side. (or at lest this gooey stuff tried to. I didn't remember it being this gooey before. Perhaps if I had read the recipe and followed it's instructions, it wouldn't have been. Aw well, at least I was able to remedy the situation.
    Into the fridge they went.
    (Bonus tip -->) Save (or have other save for you) the little plastic 'tables' that some pizza places use to keep the roof of the box, off the top of your delivered pizza. Place a bunch of these on the cookie sheets WITHOUT sticking them into the cookies.  You can then slowly and carefully slide additional trays in on top of one another and thus create more use-able space in your fridge. ;->

    Yes ;-p, the shelf above the cookies reads "Help Yourself Shelf". (Another bonus tip here)  We started this practice back when we were living with one of my (Cheryl's) brothers after our house fire. It worked so good, it continues on. Plan on using that bit of leftover roast in a casserole later this week? If it's not put on the "Help Yourself Shelf", it's left alone. Wish they would finish up/off certain leftovers?  Put it on the "Help Yourself Shelf".

    Refrigerate the cookies for a good twenty minutes.

    Once you remove them from the fridge, test one to see that it did set up. If so, stack them into your Tupperware (TM) containers till your ready to use them. If they are not set good, put them back in the fridge till they are.

  
   Now for the recipes -
   "Cream - Filled Confetti Cookies"
     The recipe is a Pillsbury (TM) one.

    (Cookies)
    1 cup Sugar
    1/2 cup Margarine, softened (I used Butter, 'softened' in the microwave)
    1/4 cup Shortening
    1 teaspoon Vanilla
    2 Eggs
    2 1/2 cups Flour
    1 teaspoon Baking Powder
    3/4 teaspoon Salt
    1/3 cup Candy Sprinkles

     In a bowl, combine sugar, margarine, shortening, vanilla, and eggs. Beat till creamy. Add flour, baking powder and salt; mixing well. Stir in candy sprinkles. Cover dough and refrigerate for one (1) hour.
    On a lightly floured surface, roll out dough a section at a time to 1/8 inch thickness. Cut with cookie cutters and place on lightly greased cookie sheet.
    Bake at 400 degrees for 5 to 7 minutes (till barely light golden brown).
    Cool.
    Frost.

    "Frosting"
   8 oz. Cream Cheese
   Thawed Strawberries and juice
   1 teaspoon Vanilla
   red Food Coloring
   Confectioners Sugar

    (According to the directions, you are suppose to ) Beat together cream cheese and strawberries. Add 1 teaspoon vanilla. Mix. Add confectioners sugar and red food coloring. If needed, add milk.
    Spread on one cookie and place another cookie on top forming "sandwich".

~ ~ ~ ~ ~ ~ ~ ~ ~ ~ ~ ~ ~ ~ 
  I 'plan' on linking this particular posting up to: 
~ "Recipe Swap Sunday('s)" are hosted by Cassity, at 'Remodelacholic' (http://www.remodelaholic.com)
~ "Melt in Your Mouth Monday('s)", hosted by Jane Doiron, at 'Make Ahead Meals For Busy Moms .. and other delicious recipes!' (http://www.makeaheadmealsforbusymoms.com)
~
"Making Your Home Sing Monday('s)", are hosted by Nan, at 'Mom's the Word (I love to hear)' (http://momstheword--livingforhim.blogspot.com/).
~ "Homemaker Mondays ... Yours, Mine & Ours", are hosted by Jen, at '11th Heaven's Homemaking Haven' (http://rtheyallyours.blogspot.com/).
~ "Market Yourself Monday", are hosted by Sumo, at 'Sumo's Sweet Stuff' (http://sumossweetstuff.blogspot.com/)
~ (Monday's) "Your Recipe, My Kitchen",  hosted by Kristen, at 'Frugal Antics of a Harried Homemaker' (http://www.wiseanticsoflife.blogspot.com)
~ "Dr. Laura's Tasty Tuesday('s)", are hosted by Dr. Laura (Aridgides), at 'Dr. Laura's Adventures' (http://www.whoislaura.com/)
~ "Tuesday Night Supper Club", is hosted by Christy Larsen, at 'Fudge Ripple' (http://fudgeripple.blogspot.com/)
~ "Totally Tasty Tuesday's", are hosted by Mandy, at 'Mandy's Recipe Box' (http://www.mandysrecipebox.blogspot.com/)
~ "Delectable Tuesday('s)", hosted by Stephani, at 'Home Sweet Farm' (http://www.ourjourneytoasimplerlife.blogspot.com/)
~ "Tuesday's Tasty Tidbits", hosted by Susan, at 'Permanent Posies - Creative Chaos' (http://permanentposies.com/)
 
~ "Tempt My Tummy Tuesday('s)", are hosted by Lisa, at 'Blessed with Grace' (http://blessedwithgrace.blogspot.com).
~ "Tuesdays at the Table", are hosted by Cole, at 'All The Small Stuff' (http://allthesmallstuff-cole.blogspot.com/).
~ "Kitchen Tip Tuesday('s)", are hosted by Tammy, at 'Tammy's Recipes' (http://www.tammysrecipes.com/).
~ "Tasty Tuesday('s)", are hosted by Jennifer, at "Balancing Beauty and Bedlam" (http://www.beautyandbedlam.com/)


Sunday, April 24, 2011

EASTER!!! :-)

    Over the years, I have written different postings about Easter. Some, about the fun cultural traditions of the holiday. Others, about what I believe is the root of Easter. An easy way for you to get a quick overview of both types, is to go HERE.

o/~ "Up  from  the  grave  He  arose !" o/~

[song "Christ Arose",  by Robert Lewry.]

      When I looked this song up in the hymnal, I found that the wording in my head for the third verse, was different than the songs actual wording. Aw well, I'm sticking with what my mind has it down as -

 o/~ ' Death could not keep Him there, Je-sus my Sav-ior! 
         He rolled the stone away, Je-sus my Lord!'   o/~

      ~  ~  ~  ~  ~  ~  ~  ~  ~  ~  ~
        
o/~  "He LIVES,  He LIVES,  Christ Jesus LIVES today!" o/~

o/~ "I serve a risen Sav-iour, He's in the world today;
        I know that He is with me, what-ever man may say;"
        (first part of first verse)

        "I know that He is leading through all the stormy blast"
         (the middle of the second verse)

        "the hope of all who seek Him, The help of all who find,
         None oth-er is so loving, so good and kind."
         (end of third verse)

       "He lives [He lives] He lives [He lives] Christ Je-sus LIVES today!
        He walks with me
        and He talks with me
        along life's narrow way,
        He lives [He lives] He lives [He lives] sal-va-tion to im-part!
        You ask me how I know He lives? He lives within my heart."  o/~

[song "He Lives",  by Alfred H. Ackley]


     Lord, Thank-you for dieing on the cross. What a painful, horrifying death you willingly and knowingly undertook, all so that you could pay the price of / for my sins.  What amazing love! Thank-you for the free gift of salvation. By accepting your gift, you cleanse me from my sins and give me eternal life. More of your amazing love. There is nothing that I personally could ever do to earn such love or such a gift. Thank-you for loving me!!!!!
   
    ~  ~  ~  ~  ~  ~  ~  ~  ~  ~  ~  

   o/~ "Lord, I lift Your name on high
          Lord, I love to sing Your praises
          I’m so glad You’re in my life
          I’m so glad You came to save us"

       "You came from heaven to earth
         To show the way
         From the earth to the cross
         My debt to pay
         From the cross to the grave
         From the grave to the sky
         Lord, I lift Your name on high"  o/~
          (Chorus)

[ song "Lord I lift your name on high",
  Words and music by Rick Founds,
   made popular by Petra]


    For more information about all of this, scroll down to our blogs footer, and follow the directions therein.

The Bz House That Love Built

Friday, April 22, 2011

just us, hanging together

        [this picture is of Cyndi enjoying a good laugh during the shower ;-) ]
      Yesterday I told you about the baby shower / come visit time we had last weekend, for Byron, Cyndi and Analyse. We had rented our church's lodge for it. For church members, the cost is extremely minimal. But it gets even better. It is less expensive to rent it for a whole day, then to just rent it for three hours, so we did!
   Brandon had got his work schedule switched around so that he had it off, and after all of the party guests left, the nine(9) [actually, ten (10) if you count Boo ;-p] of us stayed at the lodge. It was such a relaxed atmosphere, low key, nice evening. :->
   I claimed one full sized couch and crashed. Sigh. It felt good. For awhile my eyes were closed, relaxing them and slowing the dizzies. That is, except when Boo would wander over and stick his nose in my face. Or when Analyse came over to show me her new baby, or a balloon, or just to touch grandma and say "Hi!". Bliss, I tell you!  :->
   We had brought along small sub buns and the fixin's for sub sandwiches, plus there were still  foods from the party left. Everybody could munch as much as they wanted. And Analyse wanted to! She could easily reach up onto the serving table, and if she stood on tip toe, she could even see what it was she was reaching for. Seeings how what she was reaching for was fruit, or carrots, and occasionally a cracker, we just watched her in amusement. She made no pretense of being sneaky about it. In-fact, most of the time she would proudly show off what she had taken. So-o cute!
    Here's a picture of her cuteness just because  ;->


   The "boys" were all excited about what their entertainment for the evening was going to be. Originally it was going to be a video game play-off, but then Byron and Cyndi brought along the WII  they had gotten with what was left of their tax money, after certain debts were paid off.
    It was so-o fun to hear the bantering and laughter of our four "boys" playing together again!!!
    It was also fun to watch their antics. The concentrated faces each of them still makes. The silence of concentration being pierced by excited victory, or the gaff of 'how did that happen?!??'  Even though their motions often sat the waves inside of me reeling, they were so fun to watch. Brian must have thought so to, because amidst his putter-in at taking care of everything in the kitchen, he'd wander in to watch their antics for a bit, he usually left shaking his head in amusement.
   Yes, the 'girls' (Cyndi and Kayla) got turns too. Cyndi seemed to want to more than Kayla. In-fact, one time Byron went into the kitchen to get food and Cyndi took up his controller. ;-p A different time, Brandon had.
   I have no idea what this game was, but they sure did enjoy doing it!
    Once everything was packed up, the floors vacuumed and swept, etc. we were all ready to watch the new Elmo (TM) DVD grandpa had bought for Analyse and go to bed ourselves. ;-p

    Lord, THANK-YOU for the good time we can still have, just being our little family. What a blessing!!!!!


Thursday, April 21, 2011

"Baby Shower / Come Visit Time"

    Several of our friends had commented about either a. or b. .  a.) was that they hadn't seen Byron and Cyndi since the Michigan Reception, and thus also had never seen Analyse (except via my posted pictures).  b.) was that they had seen them, but mainly only from glimpses when the kids were at church, but that they hadn't really talked to them, seeings how they were always surrounded by family (two of my (Cheryl's) siblings and all of their now grown children attend the same church).
   Just like we had done our own "Christmas" with our little family, it had been voted on to do our own "Easter" as well.  This year, Palm Sunday (the Sunday before Easter) had been the selected date.
   Brian and I had decided that that weekend would also be the perfect opportunity to invite some of our friends to something, so that they could have a chance to both see and visit with our out of state kids. Seeings how before she was born, they had know Analyse was going to be a girl, most all of their infant stuff is "girlie". But this time they are having a boy, so we went with a baby shower as the basis of our get together.

    I made the invites myself. I sort of told about them  HERE.  I thought I'd show you what they looked like.


     Our 'plan' was to keep the party casual and simple.

     We kept the decorations simple by using my blue and white checkered table cloths on the main food table, a plastic pink table cloth on the dessert and beverage table, and a few pink and blue balloons here and there. (Analyse and Marly Jo [Kayla's niece who is two months younger than Analyse] found great enjoyment in playing with a few of the balloons!)
     In the middle of the main food table, we put a glass vase with silk off white football mums - Cyndi's favorite kind of flower ;-). Coming up out of the bouquet, was one pink and one blue balloon.
    
      Neither Cyndi nor I like shower games, for a multitude of reasons. But Kayla said that we had to have a game. Brian suggested just a simple answer the questions game, with some of the questions being about our kids, and others being silly questions thrown in just for the fun of it.  As I thought of them, I jotted them down. Here's what I came up with:
1.) Which of our sons is Cyndi married to?    [Byron]
2.) Which of our sons is Kayla engaged to?  [Brent]
3.) Which of our other two sons does Brian want Kate to marry?  [either  o;-p]
4.) What is Analyse's middle name?  [Christine]
5.) If a baby is born ON it's due date, from the time of conception, how long was the pregnancy?   [nine months]
6.) If the mother is carrying twins, is the pregnancy then twice as long?  [no, it just seems that way]
7.)  What children's TV character does Analyse get to watch an episode of before nap and bed time?   [Elmo]
8.) Where exactly do Byron and Cyndi live?  [_____]
9.) If 2 + 2 are 4 and 4 plus 4 are 8, what was it Little Miss Muffet' ate?  [curds and whey]
10.) What two words does this grandma often use when describing Analyse?  [adorable imp]
11.) If  o/~ I love you and you love me o/~  what kind of  o/~ fam-i-ly o/~  does that make us?  [happy]

    There were two winners. They both got a long shopping list / note pad, with a magnet on the back.
    Cyndi was suppose to get a T-shirt. Yes, 'suppose to'. I know it's in this house somewhere... it just wasn't where I was sure it was... 8-/   A-n-y-ways, it's a M+M's (TM) T-shirt, which states "I'm the nutty one".  I thought it would make a wonderful maternity shirt. ;-)

   Everybody was then instructed to help themselves to the food. Everybody all at once, no this person having to go first. However, once they got their food, they were to sit with somebody whom they either didn't know at all, or somebody they knew, but seldom got a chance to talk to. They did, and we heard later that many of them had enjoyed it. :-)

    What did we serve?  Here's the list.  I'll be doing postings down the road  for most of the items.
    ~ two (2) types of Cheese-Balls - the cheesier one was rolled in real bacon bits, the other in chopped pecans.  (By 'cheesier', I mean that it contained more cheese, not the other kind of 'cheesy'! o;-p)
    ~ Three (3) kinds of crackers: Town House (TM), Wheat Thins (TM) and Triscuit (TM).  (No recipes will be posted later for these  ;-p)
    ~ Fresh Veggies: Red and Green Pepper strips, Broccoli, Califlower, Carrots, Mushrooms, Green Onions.
    ~ My mom's recipe for Veggie Dip.
    ~ Fresh Fruits: Apples, Bananas, Musk Melon, Watermelon.
    ~ was suppose to be fruit dip, but I forgot to bring quite enough cream cheese along, so it was just marshmallow creme. 8-/
   ~  Veggie Pizza
   ~ Chocolate Cupcakes with a blue peanut M+M (TM) on top.
   ~ Unsweetened Ice Tea (with a bowl of sugar nearby) and Strawberry Lemonade.

     Here's a picture of some of the food.

     As instructed, our sons then arrived on the scene. After all, our friends wanted to see Byron too.  Together, Byron and Cyndi opened most of the gifts. But lots of our friends had brought gifts for Ms. Analyse as well, and they let her open those.


    All in all, it was a fun time. In the future, like once a year, or at the least every other year, we plan on hosting 'come visit with all of us' parties, so that our friends can 'see' our family.