

If you count the pieces the pies are cut into, you'll see it's not the 'normal' eight (8) piece cut. Some were cut into nine (9) pieces, others into ten (10) pieces. Why? Because I knew some people wouldn't want a whole piece of one thing, they wanted small pieces of a couple different pies. (<-- BONUS TIP there ;->)
Above, when I listed the types of pies I'd made, I'd actually listed the types of fillings I'd put in the crusts. We all know, that for a pie to really be labeled "GOOD!", it has to have a light, flaky, good tasting crust. And we've all had our experiences eating ones that don't fit that definition. The 'hard as shoe leather' type. Or the 'this just doesn't taste good' type. How disappointing biting into one of those turns out to be!
Personally, I love my pie crust recipe. As does my husband and father-in-law. But I will admit that I have a couple of children who don't. Then again, they have yet to eat a flour based pie crust they like. But there are a couple of pie fillings they love. 'A-typical', eh?
So to start this series on pies, I'm doing the recipe and instructions for making pie crusts first.
Step #1 - gather together your ingredients - Flour, lard, salt and water (see the metal edging of the sink? ;-p).

Step #2 - measure out your flour and then your salt and dump them in a bowl.

Use a pastry blender to blend them together. (Do you remember what other things pastry blenders work great for?)
Step #3 - Measure and add the lard to the bowl.


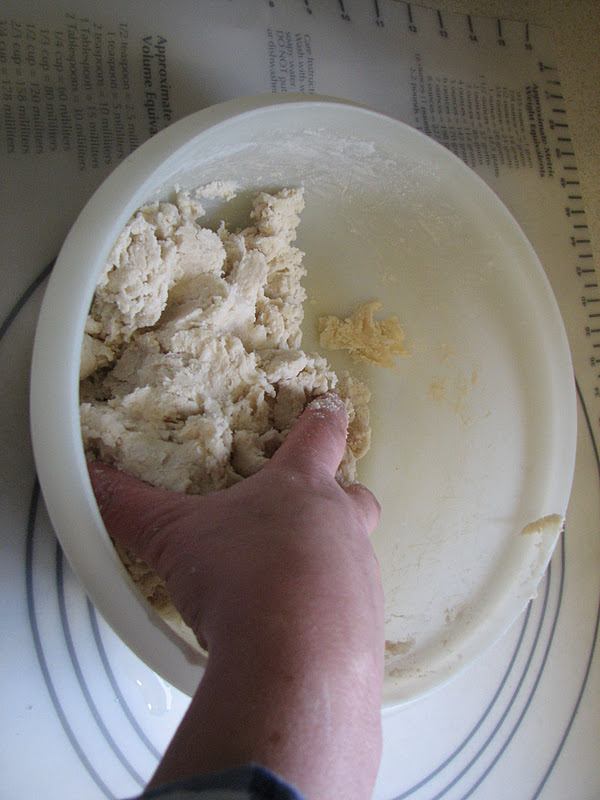
Blend with the pastry blender till it looks like this -


Step #7 - It's time to roll out your crust.
Brent and Kayla had gifted this pastry sheet(?) to me the previous Christmas. I keep it rolled up in the drawer with the measuring cups, spoons and rolling pins, with a huge elastic band wrapped around it several times, then spread out over it's length as much as possible.

But as you can see above, that results in it not laying flat when unrolled. The trick is to tightly roll it the opposite direction a couple of times, before laying it out on the counter. ;-) (<-- BONUS TIP there)

Spray your pastry sheet or counter with pan coating spray! It will make the final scrape down clean up oh so much easier!! (Do you remember what other things using pan coating spray on, makes easier / work great for?)
Scoop some or all of your dough (depending on if and how you multiplied your recipe) out of the bowl.


Flip your dough over and roll the whole length, first top to bottom, then side to side.
REMINDER - you do NOT want to over work your dough!!
The size of your dough should now be large enough to fill a pie plate.


Unfold the pie crust over half of the pie plate.


If the above methodology does not work the first (or second, or third) time you try it, DO NOT GIVE UP! This is a prime example of practice making perfect!!! Man did I have some epic failures when I first set out, ever so determined to conquer pie crusts!!! I remember one classic failure in particular. If you had watched me putting the dough in to the pie pan, you would have thought I was trying to assemble a jigsaw puzzle! (Who laughed?!? 8-/). Thankfully, the Lord intervened on my behalf and the final baked product came out perfectly. I'm still thanking Him for that one!
This year at Christmas time, I baked ten (10) pies in one day. With two (2) of them being double crusted pies. And every single pie crust came out beautifully. Again, Thank-you Lord!
Keep trying. You too WILL conquer them!
IF you will not be adding a top crust after filling the base, fold the extra crust hanging over the edge of the pie plate under (or use a knife to cut it off if you have way too much) and using your pointer finger and thumb on one hand and your pointer finger of the other hand, form scoops/scallops(?) around the edge of your pie plate.

HOWEVER, if you are adding a top crust, wait to do the edging till you have the top crust in place, then form it by squeezing the two layers of crust together.
IF you need to bake your crust before adding the filling (such as you do for Butterscotch pie), then you need to take a fork and gently poke ventilation holes in the unbaked crust first.

To per-bake a pie crust before adding the filling, bake at 375o for about 20 minutes.
Additional BONUS TIP here --> If your making more than one pie, make all of your pie crusts first, being sure to respray both your counter (or baking sheet) and rolling pin in between rolling out the dough for each pie plate.
And now for the actual recipe -
Pie Dough
by Cheryl B.
for one single crust pie:
1 1/3 cups Flour
1/2 teaspoon Salt
1/2 cup Lard
3 to 4 Tablespoons Cold Water
Combine flour and salt. With pastry blender mix in lard till coarse and crumbly. Add cold water and mix in thourally. Mix a bit more with your hands. Scoop out your dough, form it into a ball and place onto sprayed (and sometimes also floured) surface. Knead gently a couple of times. Form into flattened ball and roll out making sure to keep changing which direction your are rolling it. Go both directions, turn the dough over, and repeat.
To put dough into pie plate - first fold dough in half, then half again. Lift into pie plate and unfold. If your going to need to bake the dough before adding the filling, prick dough with a fork.
Use your fingers and thumb to make your crust edging.
To per-bake a pie crust before adding the filling, bake at 375o for about 20 minutes.
~ ~ ;-> ~ ~ ;-> ~ ~ ;-> ~ ~ ;-> ~ ~ ;-> ~ ~ ;-> ~ ~ ;-> ~ ~ ;->
You might also enjoy these postings:
~ Homemade Butterscotch Pudding / Pie
~ Homemade Chocolate Pudding
(taste wonderful served as a pie!)
~ ~ ~ ~ ~ ~ ~ ~ ~ ~ ~ ~
I 'plan' on linking this particular posting up to:~ "Foodie Wednesday('s)", are hosted by Bibi, at 'Daily Organized Chaos' (http://www.dailyorganizedchaos.com/).
~ "These Chicks Cooked Link Party", hosted by Katie L, at 'This Chick Cooks' (http://thischickcooks.blogspot.com)
~ "Full Plate Thursday('s)", are hosted by Miz Helen, at 'Miz Helen's Country Cottage' (http://mizhelenscountrycottage.blogspot.com/).
~ "Foodie Friday('s)", are hosted by "Gollum" (aka: Michael), at 'Designs by Gollum' (http://designsbygollum.blogspot.com/)
~ "Sweets For A Saturday", hosted by Lisa, at 'Sweet As Sugar Cookies' (http://sweet-as-sugar-cookies.blogspot.com)
~ "Simply Delish Sunday('s)", are hosted by KB and Whitesnakes, at 'KB and Whitesnakes Home' (http://kbandwhitesnakeshome.blogspot.com)
~ "Creative Monday's", are hosted by Clair Justine, at 'Clairejustineoxox' (http://clairejustineoxox.blogspot.com/), and Judy, at 'Judy-H-JS Thoughts' (http://judyh-jsthoughts.blogspot.com/)
~ "Homemaker Mondays ... Yours, Mine & Ours", are hosted by Jen, at '11th Heaven's Homemaking Haven' (http://rtheyallyours.blogspot.com/).
~ "Making Your Home Sing Monday('s)", are hosted by Nan, at 'Mom's the Word (I love to hear)' (http://momstheword--livingforhim.blogspot.com/).
~ "Kitchen Tip Tuesday('s)", hosted by Tammy, at 'Tammy's Recipes' (http://www.tammysrecipes.com/).
~ "Tuesday's Tasty Tidbits", hosted by Susan, at 'Permanent Posies / Creative Chaos' (http://permanentposies.com/)
~ "Totally Tasty Tuesdays", are hosted by Mandy, at 'Mandy's Recipe Box' (http://www.mandysrecipebox.blogspot.com/).
~ "Tempt My Tummy Tuesday('s)", are hosted by Lisa, at 'Blessed with Grace' (http://www.blessedwithgrace.net/).
Pie crust is my nemesis, but I am determined to conquer it one day! I do believe that practice makes perfect, and I just don't try often enough. BTW, lard does make the BEST pie crust. My mom uses it always, and her pies are the bomb.
ReplyDeleteHi Cheryl,
ReplyDeleteYour Pie crust looks great. I always make my own crust, your recipe looks like a good one. Hope you are having a great week end and thank you so much for sharing with Full Plate Thursday.
Come Back Soon!
Miz Helen
Thank you for sharing this post with us at Creative Mondays,this looks great I need to go and make a pie now :-)
ReplyDelete