My brother BL and his wife host a yearly summer party at their house, for both sides of their family. Laughter, good food, swimming, boating and a campfire are the main activities of the event. This year, instead of making something from my recipe box, I decided to try things from one of my Pinterest boards. To be honest, I had tried the pea salad one on Father's Day, and my husband raved over it, so I made that one again and another new one I thought he would like. He did! In-fact, I got lots of thumbs up on both recipes and promised to post them. Here they are then ;-]
(Reminder, you can click on the pictures to see them in larger (clearer) version)
It was hot 'round here on Saturday!!! Hot and muggy and what some consider as 'summer at it's finest' and others consider as 'summer at it's worst'. It was the kind of heat that I knew would do damage to these salads in no time flat! But how to help them on a buffet? The above picture shows the remedy I came up with.
Now for the recipes... I haven't yet figured out how to post them, so that you can print off just the recipe.. Byron was going to help by walking me through the process... but 'life' hasn't cooperated for two days now... seeings how I have promised a couple of people that I would post them, here goes the only way I currently know.... Sorry!
~ Creamy Pea Salad
Adapted from the version posted by Jamie on 'Love Bakes Good Cakes'
(http://www.lovebakesgoodcakes.com/2012/08/creamy-pea-salad.html )
~ 2 pkg.'s (16 oz. each) frozen peas, thawed and drained
~ 2 to 3 cups Colby Cheddar Cheese, diced med. size
~ 2 to 3 cups diced Mozzarella cheese
~ Half of 1 fist size Red Onion
~ 1 cup each of both Miracle Whip AND Mayonnaise
~ Salt and Pepper, to taste
~ 8 oz. Real Bacon Crumbles
Dump the drained peas and both cheeses into a large bowl.
Slice the red onion quite thinly, then dice up the slices. Add to bowl.
Use your hands to mix everything thourally.
In another bowl, blend together the Miracle Whip, Mayonnaise, Salt and Pepper. Scrape this mixture out onto the contents of the big bowl. Use a large wooden spoon to thourally blend everything together. Take a sample bite. If necessary, add more Miracle Whip and/or Mayonnaise.
Chill for an hour or two.
~ Bacon Tomato Cucumber Salad
Adapted from the version posted by Jessica on 'Simply Healthy Home'
( http://simplyhealthyhome.com/bacon-tomato-cucumber-salad/ )
~ 3 extra large seedless Cucumbers
~ 16 oz. container of grape size Tomatoes
~ 8 oz. Real Bacon Crumbles
~ 1/2 to 3/4ths cups each of both Miracle Whip AND Mayonnaise
~ 1 1/2 Teaspoons Garlic Powder
~ 1 1/2 teaspoons Sea Salt
~ 3/4 teaspoon black Pepper
Slice your Cucumbers in half lengthwise. Slice each half into 3 sections lengthwise. Now chop them into rather small chunks. Dump them into a large bowl as you go.
Cut each Tomato in half lengthwise, then in half width wise. Dump on top of the cucumbers as you go.
Add the Real Bacon Crumbles to the bowl.
Use your hands to mix everything thourally.
In another bowl, blend together the Miracle Whip, Mayonnaise, Garlic Powder, Sea Salt and Black pepper. Scrape this mixture out onto the contents of the big bowl. Use a
large wooden spoon to thourally blend everything together. Take a
sample bite. If necessary, add more Miracle Whip and/or Mayonnaise.
Chill for an hour or two.
[due to the natural wateriness of cucumbers, this salad does not have a long shelf life]
I hope you, your family and friends enjoy them as much as mine have!
We have had lots of struggles and challenges in our lives, but we've had even more blessings!
Showing posts with label Cooking and Baking. Show all posts
Wednesday, July 27, 2016
Friday, December 5, 2014
'Recipes I'd like to try'
The other evening, Brian had said that he'd like to find a new good
recipe for a certain food product. I had replied that I knew I had some
on my 'Recipes I'd Like to try' board on Pinterest. He was sure I did too. o;-p I remembered our conversation
the next day and went looking. My search revealed two different things.
First - That in the end, we're going to end up making our own
specialized recipe. See, after looking at several, I found one along the
lines of what he wanted, so I copied and pasted it to an email to send
him. Then I kept
looking. I found first this then another recipe, which was kind of
similar to the first, y-e-t ... So maybe if we replaced this product in
the first recipe, with this one from this other recipe. Oh, and maybe if
we also added this ingredient to the first recipe from that fourth
recipe. Yup, I think I have the possibilities fine tuned to a recipe
we're going to try making. And he thinks he got the just of it from the
explanation in the email. Gonna try it out ourselves before we plan to
serve it elsewhere.
Second - That my board needed some help! Often, like many other
pinners, I just re-pin something one of the people I've chosen to
'follow' has pinned. The pictures look yummy, like something somebody in
my little family would like, etc.. Occasionally I'd click on the pin so
that it opened another window to the source of the pin (recipe) and
verify that we
actually would like it (or
that with slight tweaking we should). That 'occasionally' needs to
change to a habit of always doing so!
I am literally mind boggled by how many recipes led me to a notice from
Pinterest, stating that they had "blocked" the link due to spam,
nudity, etc.. Mind boggled. Reportedly, x-rated web sites often draw
visitors to their sites, by attaching their web page/site to pictures of
things which have nothing what-so-ever to do with what their site is
actually about. But to have had that many "recipes" on my board which
weren't recipes at all.... mind boggled.
So I decided to take the time and one by one double check each and
every one of the pins on that board. Quite the undertaking, seeings how I
had over 700 pins on it. (and yes, that first sentence does sound rather redundant, so did this task.)
In the process, I found that I had duplicates of about a dozen pins. I
was impressed that it was that low. I deleted the duplicates. Or at
least I 'think' I got all of them.
A couple of other times I
thought they were duplicates, but it turned out they were from
different sources and different recipes. I kept both in case I try one
and it doesn't pass the test.
I was surprised to find that I couldn't actually access certain
recipes, unless I signed up to some recipe site/blog. While the pins
pictures looked appetizing, instead of signing up, I deleted those pins.
I just prefer it that way. Other times I was informed that viewing the blog was by "invite only". didn't realize their were private cooking sororities on line.
Quite a few times, I found that instead of leading me to the recipe
itself, the link led to a web site. Sometimes I was successful in
finding the actual recipe, deleted the original pin and then pinned the
actual link onto my board. Other times, my searching was unsuccessful
and I ended up just deleting the pin altogether.
One time I got quite the surprise. The pin stated that
it was for a chicken dish that Olive Garden makes. I figured it led to a
'knock off' version of their recipe. Instead, it lead to the
restaurant's on line - carry out ordering page. :-p Here's that link in
case you wish to
use it - http://www.olivegarden.com/menu-listing/pronto-lunch.
There were a few that got deleted just because. I had clicked on it,
got to the recipe and said "nope, I don't want to make that".
Then there were the ones that led to a picture somebody somewhere had
posted on Flicker. No recipe link any-where, just a clearer view of the
yummy goodness. :-[
Okay, I will admit that I did keep a couple of the pins that led to
pinterest blocked warnings. The reasons that I kept the couple that I
did, was because there was enough of the recipe included in the pins
description itself that I could work with.
For the record, w-a-y into the process, I realized that instead of deleting the original pin, I could just delete the 'source' of it (click to edit pin), thus redirecting where you go when you click on it. Technology, I'm slow, but eventually I catch on.
That board has now been totally edited/checked. Can't believe that the number of pins on it dropped down to 600 (601 if you count the recipe Benson sent me and I added last night).
"Do you ever plan on trying all of them?" you ask. As a matter of fact, we have come up with a 'plan'. We are going to start trying recipes off of it at least twice a week. Once, during the week for dinner. The second one will be as part of Sunday's dinner, albeit the main course, side dish or dessert. Or maybe we''ll do all three and get further faster :-].
You are hereby invited to go browse through the board yourself and try and all recipes you find intriguing. http://www.pinterest.com/cherylbz/recipes-i-d-like-to-try/
Labels:
Cooking and Baking,
Pinterest
Tuesday, September 17, 2013
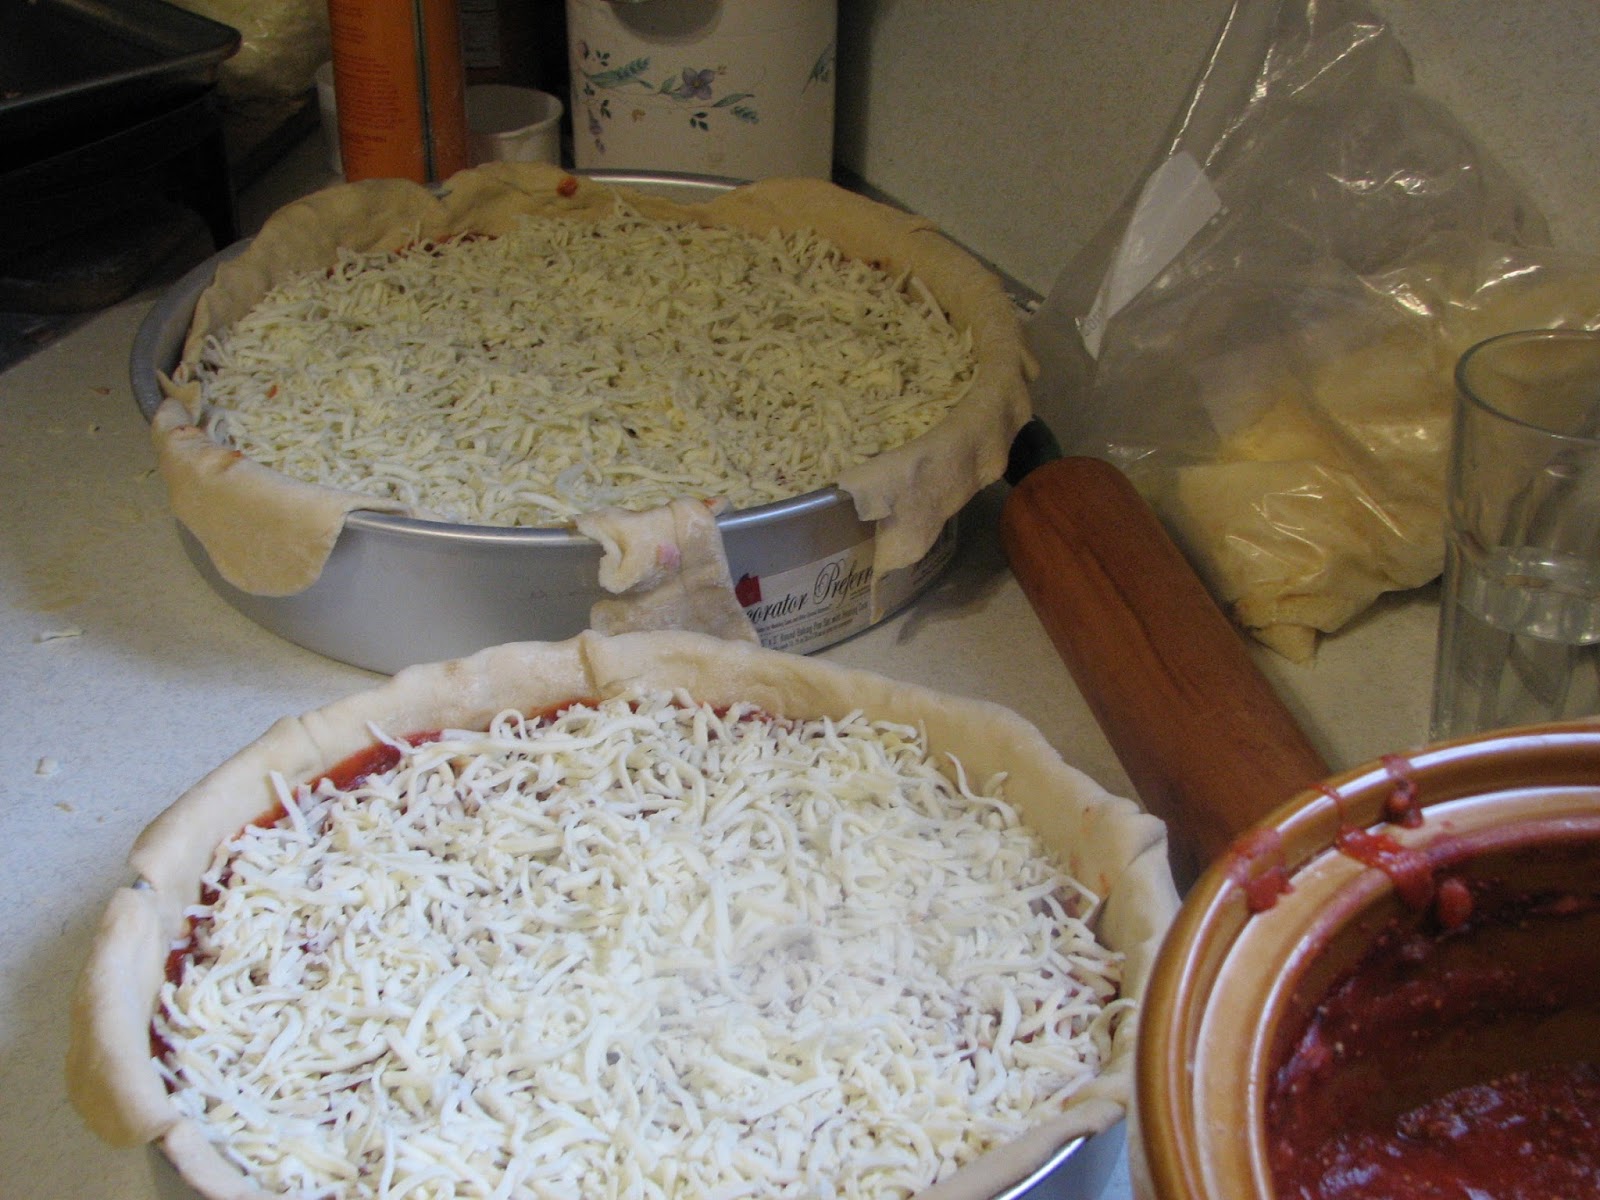
The Bz's D-E-E-P dish pizza
Years
ago, I started making our pizza's from scratch. Feeding 5 guys (and
often others) ordered out pizza, was just not budget friendly! I did it
for many years. Then I tapered off. Many reasons as to the 'why'. The
guys have been after me to start making it again, which I find comical,
in part, seeings how a couple of them do make it themselves, using my
recipe. Not only have they been wanting me to make homemade pizza for
them, but they really want the 'deep dish' kind. And always, they have
added (with smirks) "This time, make it r-e-a-l-l-y deep!"
It was decided that this now past Sunday, we were going to do a
birthday dinner. Brent's (much belated) and Benson's. What to fix for
dinner that both of those two would think was a meal specially for
them?! Quite a quandary, I tell you. Then the idea hit, make homemade
pizza. But not just regular pizza, because to make enough to satisfy the
whole group, It would take three batches, of only two in the oven at a
time... so make deep dish ones. Then with an audible giggle, the idea
came to use my huge wedding cake type of pans as d-e-e-p pizza pans. :->
The next quandary was for a dessert for those two. Another idea came that was such a hit! But that's another posting.
I had posted this on my Facebook wall Sunday morning - "Headed
into the kitchen to start prepping for tonight's family dinner,
celebrating Brent's ( a 'bit' belated) and Benson's birthday's. I'm
concocting my own version of a much loved 'dish'. Here's hoping it turns
out.... In hopes that it does turn out as a "keep it" recipe, I'm
taking both notes and pictures as I go..."
The B'z D-E-E-P dish pizza -
-picture of finished pizza -
From my notes -
1st step
- send Brian off with a shopping list. Did that Sat. evening. Thanked
both Brian and God that he added a few things to the list, especially
the eggs and butter I hadn't thought to add, but needed for the
dessert!
2nd step - Making the SAUCE -
Dump the following into a large crock-pot -
1 - #10 can (6 lbs 10 oz) GFS Tomato Sauce
1/2 cup grated REAL Parmesan Cheese
1/4 cup dried Parsley Flakes
1/8 cup (dried) Leaf Oregano
1/8 cup (dried) Sweet Basil Leaves
1/2 cup (dried) Minced Onion
1/4 cup Garlic Powder
1/8 cup Granulated Sugar
1 Tablespoon Salt
1/2 teaspoon Pepper
1 Tablespoon Mild Chili Powder
whisk it together.
Plug crock-pot in, with lid on, and cook on low for 4 hours or so.
3rd step - Open and set to draining #10 can (4 lb 4 oz = 68 oz total) Mushroom Stems + Pieces
4th step - brown the Sausage.
Heavily spray electric skillet (or whatever skillet you use).
Use kitchen shears (LOVE them!) on sausage logs. Place logs in skillet. Chop logs in half lengthwise.
then
again, and again... then switch and start the other direction (the
width of the pan). Chop away until all of the meat is in small pieces.
Scoop meat away from one end of the pan and spoon out excess grease
(NEVER dump it down the drain! It will eventually create horror clogs in
your drains, and if you have septic tanks... it results in huge
expensive problems! Use previously emptied and rinsed out metal cans.
Store them in your freezer till the morning of trash day.)
Dump finely chopped out sausage onto a cookie sheet lined with 3 layers of paper toweling. Set aside.
5th step - re-spray and re-plug in the electric skillet. Cook Bacon.
2 packages (3.5 lbs each) Naturally Hickory Smoked Thick Sliced Bacon (from Sam's Club)
When
pieces are done, lay them on another triple layered paper towel covered
cookie sheet. Set aside. When cooled a bit, chop into fine pieces.
Steps 5 and 6 can easily be done simultaneously.
6th step - Peppers. I used red, orange and yellow ones.
core them, remove all the seeds, cut into thin strips and then into small pieces.
so-o pretty -
What
I didn't do this time but WILL do from now on, is to roast them first.
Not doing so, resulted in a lot of liquid in the finished pizza. Next
time I will roast them first and let them dry on paper toweling like I
did some of the meats. Live and learn.
7th step - the DOUGH.
I copied this recipe out of a thin, non hard cover cookbook, titled
"Italian Food Cookbook" that I don't remember if I had received as a
shower or wedding gift, or if I had picked it up somewhere.
I made 4 times the recipe, but I will be nice and put the single batch recipe here -
1 Tablespoon dried yeast
3/4 cup warm water (186 ml)
2 1/4 cups flour
1/2 teaspoon salt
1 (or more) Tablespoon(s) olive oil
1) Put yeast into a small glass bowl and add the warm water. Allow to stand 5 minutes, then mix till smooth.
2)
Measure flour into a warm (sprayed) bowl (I rinse the bowl under HOT
tap water for a couple of minutes, let air dry for 1 minute, then use)
with the salt. Blend some.
3)
Pour the yeast mixture into the flour with one Tablespoon olive oil.
Mix with your (sprayed) hands to a stiff dough. If mixture is too dry.
add more olive oil, mixing again before deciding whether or not to add
even more. Before kneading, let dough sit for five (5) minutes. The
recipe then says to knead on a floured board for ten (10) minutes. I
usually just knead it in the bowl.
4)
Lift the dough out with one hand, respray the bowl, put dough back in,
turning it till all sides have some of the spray on it.
Cover the bowl
with light weight dish cloths and place in a draft free spot (the inside
of your not turned on oven works great!), until doubled in size (an
hour for a single batch, hour and a half for 4 x the recipe).
8th step - can be done while dough is rising. Ham.
Slice half of a large (boneless) ham very thinly. Then chop it up into small bits.
Yet again, place the meat onto a paper towel lined cookie sheet and set aside.
9th step -
-picture of risen dough -
Spray
your counter top with pan coating spray, lightly flour the area, do
both to your rolling pin. Take all of your dough if your doing a single
batch, or the right percentage of your dough if you did a multiple
batch, and with sprayed hands, between your hands, knead it a bit more
till it's smooth and elastically. Place dough onto prepared counter top
and starting from the middle, rolling out first one direction, then the
other, then from an angle, then another angle. Turn dough over and start
all over again. Keep doing thus until your dough is larger than the pan
you plan on using (hold pan just above rolled out dough to judge
size). Fold dough in half, then half again and place along one edge of
well sprayed pizza pan (or whatever pan your using). Unfold dough
gently. If your using a deep pan, make sure you get it up and over the
sides. Getting it even over the edge of the pan, will help keep it in
place better for filling. If you need to stretch it some, start in the
middle of the pan and using your finger tips, slowly work the dough
towards the outside, stretching a bit as you go. Be gentle! You don't
want to rip it and have to patch it.
10th step - Assembly time - (turn your oven on to start preheating)
Once the dough is in the pan right, let it sit for 5 minutes before you start adding your layers.
LAYERS: Remember, your going to want some of every ingredient in every single bite!
Sauce. (thick enough that your not seeing the dough through it.)
Ham.
Mushrooms
[For
the record - the larger pizza had the layers of mushrooms and peppers,
the smaller pizza did not. Next time I'll be making a third one, with
out the pepperoni. It tipped the spice table too much for a couple of
us. Pepperoni is not worth heart burn. Period. ]
Pepperoni
Another layer of Sauce
Shredded Mozzarella Cheese
Peppers
Sausage
Bacon
Another layer of Mozzarella Cheese
Add a third layer of the Sauce
heavily sprinkled on Parmesan Cheese
11th step - BAKE
I baked them for 45 minutes at 450 degrees. The bottom crust was a bit tough, so next time I plan on baking them at 400 degrees and covering them for the first 40 minutes.
Remove them from oven, sprinkle on just a bit more Mozzarella Cheese, put a round cookie sheet upside down on them (to help the cheese melt some) and let the pizzas sit up for 10 minutes or so before slicing and serving.
When
asked, the pizza got several thumbs up and a few thumbs sideways.
Roasting the peppers first, as well as lowering the baking temp and
baking it covered for most of the baking time, 'should' help turn most
of the reasons for the thumbs sideways to thumbs up. ;->
The
amount of time invested - a lot. Worth it? Oh yeah! Their eyes when
they discoverd that the pans contained deep dish pizza were priceless! o:->
No photo shop work was done on these pictures. Yes, some could have used it. Still conquering the mountain of laundry in the basement.
~ ~ ~ ~ ~ ~ ~ ~ ~ ~ ~ ~
I 'plan' on linking this particular posting up to:
~ "Making Your Home Sing Monday('s)", are hosted by Nan, at 'Mom's the Word (I love to hear)' (http://momstheword--livingforhim.blogspot.com/).
~ "Kitchen Tip Tuesday('s)", hosted by Tammy, at 'Tammy's Recipes' (http://www.tammysrecipes.com/).
~ "Tuesday's Tasty Tidbits", hosted by Susan, at 'Permanent Posies / Creative Chaos' (http://permanentposies.com/)
~ "Totally Tasty Tuesdays", are hosted by Mandy, at 'Mandy's Recipe Box' (http://www.mandysrecipebox.blogspot.com/).
~ "Tempt My Tummy Tuesday('s)", are hosted by Lisa, at 'Blessed with Grace' (http://www.blessedwithgrace.net/).
~ "Full Plate Thursday('s)", are hosted by Miz Helen, at 'Miz Helen's Country Cottage' (http://mizhelenscountrycottage.blogspot.com/).
~ "Foodie Friday('s)", are hosted by "Gollum" (aka: Michael), at 'Rattlebridge Farm' (http://designsbygollum.blogspot.com/)
~ ~ ~ ~ ~ ~ ~ ~ ~ ~ ~ ~
I 'plan' on linking this particular posting up to:
~ "Making Your Home Sing Monday('s)", are hosted by Nan, at 'Mom's the Word (I love to hear)' (http://momstheword--livingforhim.blogspot.com/).
~ "Kitchen Tip Tuesday('s)", hosted by Tammy, at 'Tammy's Recipes' (http://www.tammysrecipes.com/).
~ "Tuesday's Tasty Tidbits", hosted by Susan, at 'Permanent Posies / Creative Chaos' (http://permanentposies.com/)
~ "Totally Tasty Tuesdays", are hosted by Mandy, at 'Mandy's Recipe Box' (http://www.mandysrecipebox.blogspot.com/).
~ "Tempt My Tummy Tuesday('s)", are hosted by Lisa, at 'Blessed with Grace' (http://www.blessedwithgrace.net/).
~ "Full Plate Thursday('s)", are hosted by Miz Helen, at 'Miz Helen's Country Cottage' (http://mizhelenscountrycottage.blogspot.com/).
~ "Foodie Friday('s)", are hosted by "Gollum" (aka: Michael), at 'Rattlebridge Farm' (http://designsbygollum.blogspot.com/)
Labels:
Cooking and Baking
Thursday, April 4, 2013
My version of 'Stuffed Cabbage'
As a family, we had eaten Corned Beef, Red Potatoes in butter and parsley, Sauerkraut (well, three of them had it 8-p), etc., for Sunday Dinner the Sunday before St. Patrick's day. I know they r-e-a-l-l-y
liked it, due to how little was left afterwords. So much for making a
big casserole out of it later in the week. Aw well. I totally took it as
a compliment!
But I still wanted to make some type of a Corned Beef Dinner for St. Patrick's day, just because. Yes, I know that there are lots of other Irish type recipes that use other meats. But we really like corned beef, yet we seldom have it. Crazy! So I went through my 'St. Patty's Day' Pinterest board and my 'Recipes I'd like to try board' trying to find something that struck my fancy.
In doing so, I came across this recipe for 'Stuffed Cabbage'. The note I had made to myself read, "only substitute chopped tomatoes for the raisins". (More about that in a minute.) I had made stuffed cabbage one time, ever so many years ago. Our sons hadn't liked it at all! I had only been mildly impressed. But Brian had really liked it. He's often talked about liking stuffed cabbage. One time we had eaten it some place else and I had made a mental note about his comments concerning how dry theirs had been. I knew that 'someday' I would break down / get brave and make it for him again. Only took over fifteen years to do so. o:->
I clicked on the picture on pinterest, to go to the recipe itself. Reading down the ingredients... vegetable oil - "no problem", yellow onion - "no problem", green cabbage - "okay", ground beef - "I can just substitute finely chopped up, already cooked, corned beef", cooked rice - "Brian's not a fan of white rice, I'll substitute finely chopped potatoes", raisins - "Brian does not like raisins! But I could substitute chopped canned tomatoes", (When I was explaining all of this at the dinner table, Byron commented on how the raisins part was a highly praised thing in Polish communities [Cyndi is from a strong Polish family]. Grandpa 'Honey' reminded him that he (Byron) comes from a strong English background. :-p). salt - "okay", tomato sauce - "that would go good with all of my substitutions", beef broth - "corned beef still is beef", paprika - "have it on hand", top with sour cream - "oh, I bet that would taste good!". And thus the recipe for 'my version' of Stuffed Cabbage was formed.
Now on to how I made it, partly so I can do so again, as has been highly requested; and also so that you might want to make it too.
First step - remember that I was making a big batch of them. You can adjust the recipe to how many you personally want to make.
Pull the corned beef briskets out of the fridge and thourally spray the roaster with pan coating spray. [Remember, tis easier to spray, then to scrub forever afterwords!]
[ # 690 ]
Place the briskets fat side up in the roaster. [ Do NOT cut the layer of fat off of meat before cooking it!!! Always place the meat in your pan or on your grill with the fat side up. That way, as the meat cooks, the flavors of the meat, which are stored in the fat, flow down into the meat producing a more favorable and moist finished product. Once the meat is done cooking, let it 'sit up' for five minutes (covered somehow), then it's okay to cut any remaining fat off, before slicing and serving.
[ # 691 ]
I pour the juices out of the package over the meat and into the pan too. Yes, it's a little slimy. But I figure, 1 - it's it's good enough to be packed in it, it's good enough to be cooked in it. No. 2 - since it's been sealed together, it must contain a lot of the flavoring of the meat and it's better to keep it in there while it bakes, rather than rinsing it down the drain. And 3 - The mere process of baking it, will remove any un-pleasantries from it.
[ # 692 ]
Sprinkle on the spices that come inside the little packets with the meat.
[ # 693 ]
Put the lid on the pan, put the pan in the preheated oven (temp. set to what the meat package said) and bake. The package says to bake so long per pound of meat. For tenderer meat, cook an additional hour.
While the meat is baking, go ahead and get started on the other ingredients. First up, the carrots. After chopping the ends off, use a vegetable peeler to peel them. [I set a used bread bag inside a plastic container in the sink to do so. Makes cleanup ever so much easier! Peel about two inches of the thick end first, then turn the carrot upside down and peel away.
Slice the carrot in half lengthwise, then cut/slice the halves into thirds.
[ # 694 ]
Proceed on to chopping the long thin slices into small pieces.
[ # 695 ]
Some I chopped into small pieces to go inside the cabbage rolls, some I made larger to bake and serve in a side dish.
[ # 696 ]
Next up come the potatoes. I use red skinned potatoes, because for whatever reason, they contain less natural sugar and thus are better for people with high sugar levels (diabetics, etc.)
[ # 697 ]
Then turn them and either cut them into very small pieces for in the cabbage rolls, or into larger sizes for part of the side dish.
[ # 698 ]
Layer both types of the potatoes into well sprayed baking pans (it's okay to use glass or metal ones, I used the glass ones since the pictures would show what I'm talking about easier). Top the potatoes with the same sized chopped carrots.
Top the carrots in the larger sized veggies pan, with thin sliced butter (yes, real butter) slabs.
[ # 699 ]
Yup, that's a lot of butter. But you want it to cook into all of your chopped veggies, not just some here and there. And it will melt down and do exactly that during the baking process.
Finely chop up a yellow onion and layer it on top of the carrots in the smaller sized chopped veggies pan.
[ # 700 ]
Now top that pan with thin slices of butter.
[ # 701 ]
Cover them and place them in the oven with the baking meat. I 'think' I baked the veggies for an hour. (Should have written that part down too. Sorry).
Time to start prepping the canned tomatoes. Now yes, you can buy cans of already chopped tomatoes, but they contain such big chunks, larger than I wanted. And pureed tomatoes don't really contain chunks. Therefore, I cut them up into the size I want! First drain the tomatoes (saving the juices for later!), cut into each tomato right before you remove it from the strainer, so that the juices on the inside slip out there, instead of all over your cutting board.
[ # 702 ]
Sorry, I could not get the picture to stayed turned.
Once your done, set them aside (back in the rinsed out strainer until it's time to combine all of the filling ingredients.
Once you have removed the meat from the oven, let it sit for fifteen minutes (sitting up time plus cooling down a little time), slice the meat into thin slices, slice the thin slices into thin strips, then chop them into smaller pieces via turning them the other way (I just turn my cutting board. ;-> )
[ # 704 ]
Dump each board full of the chopped up meat, into a big mixing bowl. {Remember, I was making a big batch of them}.
[ # 705 ]
Remove the finely chopped up veggies from the oven.
[ # 706 ]
Add them to the bowl. Add the chopped tomatoes. Blend everything together thourally! You want to get a little bit of everything in every single bite.
It's time to get the cabbage ready. Directions of the recipe on line stated, "Bring large pot of salted water to a boil (a full boil is when the big bubbles form and roll on top of one another). Remove core from cabbage head. Place cabbage in water. After about two minutes the outside leaf will come lose. Remove it with tongs. Pat dry with paper towels. Keep repeating." I was going to take pictures of this process... but then the cabbage head started bobbing in the water. And when I tried to remove the first leaf, I learned that I must not have cut out quite enough of the core, because the leaf wouldn't come 100% free. So there I was, at 11:00 at night, me - 'Ms. Vertigo', trying to cut each leaf off a bobbing head of cabbage, in a pan of boiling water... Mercy! I really am quite surprised they never did an episode of 'I Love Lucy' out of this process! o:-D "Cut out the thick part of the rib of each leaf, but don't cut more than a third of the way into the leaf. With the stem side of the cabbage facing you, place a scant 1/3 cup of the beef mixture in the center of each cabbage leaf. Fold the bottom edge over the mixture and then fold the sides over and roll into a tidy packet." 'Tidy', hummm. Maybe the ground beef and rice stick together more and make it easier to make a 'tidy' packet'. I don't know. Do the best you can. I did. "Place the cabbage rolls seam side down in (well) greased baking pan." Squeeze them close enough together and make sure you have a large spoon to scoop them out with at dinner time. ;-> I was ever so totally amazed, for how falling apart mine were when I left them in the pan before baking, they came out all together in nice little bundles when we scooped them out. I literally thanked the Lord for that while sitting in my spot at the table!
"Mix together the tomato sauce, broth and paprika." I improvised again. Why drain the juice off of the canned tomatoes and dump it?! I mixed a can of tomato paste in with the liquid from the canned tomatoes, added the beef broth (I used two cups) and paprika (I used 2 teaspoons) and blended thourally.
[ # 707 ]
Pour the broth mixture over your crammed full pan of cabbage rolls.
[ # 708 ]
I refrigerated the finished rolls overnight (most things (such as goulash, spaghetti sauce, etc.) taste better after the mixture has been chilled together and then reheated, right? ).
Bake at 350o for 1 hour.
I served ours with the other baked veggies, peas (many of the Irish recipes contain peas. I am not a fan of peas. But both Brian and his dad are. Therefore, I served them as a side dish. o;-p.), green beans w/ bacon, dinner rolls, and a pasta mixture, because I wasn't sure if our now adult sons would like the new cabbage rolls or not.
[ # random pic.'s - stuffed cabbage rolls - picture is smaller due to being sent to me via Byron's phone. Thanks Byron! ]
By the way, topping the stuffed cabbage rolls with sour cream is an wonderful idea!
And for the record, Grandpa 'Honey', Brian, Brent and Kayla kept exclaiming over dinner about how good my version was and each one inquired if I had remembered to write down what I did as I went along, so I could make them again, sooner than fifteen years from now. :-D I love it when an idea works out!
I had ended up with one and three quarters pans full. Had filling for more, but was not up to boiling another head of cabbage. It (the cabbage) was turned into slaw a few days later. :-> Brian ate up the left over filling for lunch one day.
~ ~ ~ ~ ~ ~ ~ ~ ~ ~ ~ ~
I 'plan' on linking this particular posting up to:
~ "Making Your Home Sing Monday('s)", are hosted by Nan, at 'Mom's the Word (I love to hear)' (http://momstheword--livingforhim.blogspot.com/).
~ "Kitchen Tip Tuesday('s)", hosted by Tammy, at 'Tammy's Recipes' (http://www.tammysrecipes.com/).
~ "Tuesday's Tasty Tidbits", hosted by Susan, at 'Permanent Posies / Creative Chaos' (http://permanentposies.com/)
~ "Totally Tasty Tuesdays", are hosted by Mandy, at 'Mandy's Recipe Box' (http://www.mandysrecipebox.blogspot.com/).
~ "Tempt My Tummy Tuesday('s)", are hosted by Lisa, at 'Blessed with Grace' (http://www.blessedwithgrace.net/).
~ "Full Plate Thursday('s)", are hosted by Miz Helen, at 'Miz Helen's Country Cottage' (http://mizhelenscountrycottage.blogspot.com/).
~ "Foodie Friday('s)", are hosted by "Gollum" (aka: Michael), at 'Rattlebridge Farm' (http://designsbygollum.blogspot.com/)
But I still wanted to make some type of a Corned Beef Dinner for St. Patrick's day, just because. Yes, I know that there are lots of other Irish type recipes that use other meats. But we really like corned beef, yet we seldom have it. Crazy! So I went through my 'St. Patty's Day' Pinterest board and my 'Recipes I'd like to try board' trying to find something that struck my fancy.
In doing so, I came across this recipe for 'Stuffed Cabbage'. The note I had made to myself read, "only substitute chopped tomatoes for the raisins". (More about that in a minute.) I had made stuffed cabbage one time, ever so many years ago. Our sons hadn't liked it at all! I had only been mildly impressed. But Brian had really liked it. He's often talked about liking stuffed cabbage. One time we had eaten it some place else and I had made a mental note about his comments concerning how dry theirs had been. I knew that 'someday' I would break down / get brave and make it for him again. Only took over fifteen years to do so. o:->
I clicked on the picture on pinterest, to go to the recipe itself. Reading down the ingredients... vegetable oil - "no problem", yellow onion - "no problem", green cabbage - "okay", ground beef - "I can just substitute finely chopped up, already cooked, corned beef", cooked rice - "Brian's not a fan of white rice, I'll substitute finely chopped potatoes", raisins - "Brian does not like raisins! But I could substitute chopped canned tomatoes", (When I was explaining all of this at the dinner table, Byron commented on how the raisins part was a highly praised thing in Polish communities [Cyndi is from a strong Polish family]. Grandpa 'Honey' reminded him that he (Byron) comes from a strong English background. :-p). salt - "okay", tomato sauce - "that would go good with all of my substitutions", beef broth - "corned beef still is beef", paprika - "have it on hand", top with sour cream - "oh, I bet that would taste good!". And thus the recipe for 'my version' of Stuffed Cabbage was formed.
Now on to how I made it, partly so I can do so again, as has been highly requested; and also so that you might want to make it too.
First step - remember that I was making a big batch of them. You can adjust the recipe to how many you personally want to make.
Pull the corned beef briskets out of the fridge and thourally spray the roaster with pan coating spray. [Remember, tis easier to spray, then to scrub forever afterwords!]
[ # 690 ]
Place the briskets fat side up in the roaster. [ Do NOT cut the layer of fat off of meat before cooking it!!! Always place the meat in your pan or on your grill with the fat side up. That way, as the meat cooks, the flavors of the meat, which are stored in the fat, flow down into the meat producing a more favorable and moist finished product. Once the meat is done cooking, let it 'sit up' for five minutes (covered somehow), then it's okay to cut any remaining fat off, before slicing and serving.
I pour the juices out of the package over the meat and into the pan too. Yes, it's a little slimy. But I figure, 1 - it's it's good enough to be packed in it, it's good enough to be cooked in it. No. 2 - since it's been sealed together, it must contain a lot of the flavoring of the meat and it's better to keep it in there while it bakes, rather than rinsing it down the drain. And 3 - The mere process of baking it, will remove any un-pleasantries from it.
Sprinkle on the spices that come inside the little packets with the meat.
[ # 693 ]
Put the lid on the pan, put the pan in the preheated oven (temp. set to what the meat package said) and bake. The package says to bake so long per pound of meat. For tenderer meat, cook an additional hour.
While the meat is baking, go ahead and get started on the other ingredients. First up, the carrots. After chopping the ends off, use a vegetable peeler to peel them. [I set a used bread bag inside a plastic container in the sink to do so. Makes cleanup ever so much easier! Peel about two inches of the thick end first, then turn the carrot upside down and peel away.
Slice the carrot in half lengthwise, then cut/slice the halves into thirds.
[ # 694 ]
Proceed on to chopping the long thin slices into small pieces.
[ # 695 ]
Some I chopped into small pieces to go inside the cabbage rolls, some I made larger to bake and serve in a side dish.
[ # 696 ]
Next up come the potatoes. I use red skinned potatoes, because for whatever reason, they contain less natural sugar and thus are better for people with high sugar levels (diabetics, etc.)
[ # 697 ]
Then turn them and either cut them into very small pieces for in the cabbage rolls, or into larger sizes for part of the side dish.
Layer both types of the potatoes into well sprayed baking pans (it's okay to use glass or metal ones, I used the glass ones since the pictures would show what I'm talking about easier). Top the potatoes with the same sized chopped carrots.
Top the carrots in the larger sized veggies pan, with thin sliced butter (yes, real butter) slabs.
[ # 699 ]
Yup, that's a lot of butter. But you want it to cook into all of your chopped veggies, not just some here and there. And it will melt down and do exactly that during the baking process.
Finely chop up a yellow onion and layer it on top of the carrots in the smaller sized chopped veggies pan.
[ # 700 ]
Now top that pan with thin slices of butter.
[ # 701 ]
Cover them and place them in the oven with the baking meat. I 'think' I baked the veggies for an hour. (Should have written that part down too. Sorry).
Time to start prepping the canned tomatoes. Now yes, you can buy cans of already chopped tomatoes, but they contain such big chunks, larger than I wanted. And pureed tomatoes don't really contain chunks. Therefore, I cut them up into the size I want! First drain the tomatoes (saving the juices for later!), cut into each tomato right before you remove it from the strainer, so that the juices on the inside slip out there, instead of all over your cutting board.
[ # 702 ]
Sorry, I could not get the picture to stayed turned.
Once your done, set them aside (back in the rinsed out strainer until it's time to combine all of the filling ingredients.
Once you have removed the meat from the oven, let it sit for fifteen minutes (sitting up time plus cooling down a little time), slice the meat into thin slices, slice the thin slices into thin strips, then chop them into smaller pieces via turning them the other way (I just turn my cutting board. ;-> )
[ # 704 ]
Dump each board full of the chopped up meat, into a big mixing bowl. {Remember, I was making a big batch of them}.
[ # 705 ]
Remove the finely chopped up veggies from the oven.
Add them to the bowl. Add the chopped tomatoes. Blend everything together thourally! You want to get a little bit of everything in every single bite.
It's time to get the cabbage ready. Directions of the recipe on line stated, "Bring large pot of salted water to a boil (a full boil is when the big bubbles form and roll on top of one another). Remove core from cabbage head. Place cabbage in water. After about two minutes the outside leaf will come lose. Remove it with tongs. Pat dry with paper towels. Keep repeating." I was going to take pictures of this process... but then the cabbage head started bobbing in the water. And when I tried to remove the first leaf, I learned that I must not have cut out quite enough of the core, because the leaf wouldn't come 100% free. So there I was, at 11:00 at night, me - 'Ms. Vertigo', trying to cut each leaf off a bobbing head of cabbage, in a pan of boiling water... Mercy! I really am quite surprised they never did an episode of 'I Love Lucy' out of this process! o:-D "Cut out the thick part of the rib of each leaf, but don't cut more than a third of the way into the leaf. With the stem side of the cabbage facing you, place a scant 1/3 cup of the beef mixture in the center of each cabbage leaf. Fold the bottom edge over the mixture and then fold the sides over and roll into a tidy packet." 'Tidy', hummm. Maybe the ground beef and rice stick together more and make it easier to make a 'tidy' packet'. I don't know. Do the best you can. I did. "Place the cabbage rolls seam side down in (well) greased baking pan." Squeeze them close enough together and make sure you have a large spoon to scoop them out with at dinner time. ;-> I was ever so totally amazed, for how falling apart mine were when I left them in the pan before baking, they came out all together in nice little bundles when we scooped them out. I literally thanked the Lord for that while sitting in my spot at the table!
"Mix together the tomato sauce, broth and paprika." I improvised again. Why drain the juice off of the canned tomatoes and dump it?! I mixed a can of tomato paste in with the liquid from the canned tomatoes, added the beef broth (I used two cups) and paprika (I used 2 teaspoons) and blended thourally.
[ # 707 ]
Pour the broth mixture over your crammed full pan of cabbage rolls.
[ # 708 ]
I refrigerated the finished rolls overnight (most things (such as goulash, spaghetti sauce, etc.) taste better after the mixture has been chilled together and then reheated, right? ).
Bake at 350o for 1 hour.
I served ours with the other baked veggies, peas (many of the Irish recipes contain peas. I am not a fan of peas. But both Brian and his dad are. Therefore, I served them as a side dish. o;-p.), green beans w/ bacon, dinner rolls, and a pasta mixture, because I wasn't sure if our now adult sons would like the new cabbage rolls or not.
[ # random pic.'s - stuffed cabbage rolls - picture is smaller due to being sent to me via Byron's phone. Thanks Byron! ]
By the way, topping the stuffed cabbage rolls with sour cream is an wonderful idea!
And for the record, Grandpa 'Honey', Brian, Brent and Kayla kept exclaiming over dinner about how good my version was and each one inquired if I had remembered to write down what I did as I went along, so I could make them again, sooner than fifteen years from now. :-D I love it when an idea works out!
I had ended up with one and three quarters pans full. Had filling for more, but was not up to boiling another head of cabbage. It (the cabbage) was turned into slaw a few days later. :-> Brian ate up the left over filling for lunch one day.
~ ~ ~ ~ ~ ~ ~ ~ ~ ~ ~ ~
I 'plan' on linking this particular posting up to:
~ "Making Your Home Sing Monday('s)", are hosted by Nan, at 'Mom's the Word (I love to hear)' (http://momstheword--livingforhim.blogspot.com/).
~ "Kitchen Tip Tuesday('s)", hosted by Tammy, at 'Tammy's Recipes' (http://www.tammysrecipes.com/).
~ "Tuesday's Tasty Tidbits", hosted by Susan, at 'Permanent Posies / Creative Chaos' (http://permanentposies.com/)
~ "Totally Tasty Tuesdays", are hosted by Mandy, at 'Mandy's Recipe Box' (http://www.mandysrecipebox.blogspot.com/).
~ "Tempt My Tummy Tuesday('s)", are hosted by Lisa, at 'Blessed with Grace' (http://www.blessedwithgrace.net/).
~ "Full Plate Thursday('s)", are hosted by Miz Helen, at 'Miz Helen's Country Cottage' (http://mizhelenscountrycottage.blogspot.com/).
~ "Foodie Friday('s)", are hosted by "Gollum" (aka: Michael), at 'Rattlebridge Farm' (http://designsbygollum.blogspot.com/)
Labels:
Cooking and Baking
Subscribe to:
Posts (Atom)